Making a Case for Making a Case
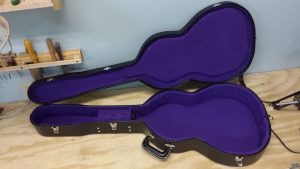
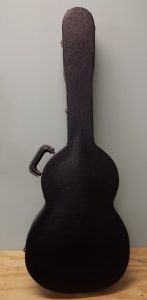 Guitar cases are an essential commodity for a guitar builder. Standard size cases can be purchased fairly easily, for a reasonable price. If you make an instrument that doesn’t fit into a standard case, your options are to have a case custom made, or to retrofit an over sized case. I have a few models that don’t fit into standard size cases and require custom cases. I’ve had custom cases made by a variety of manufacturers and for one reason or another have not been satisfied, either with the case or with the service. I’ve retrofitted some over sized cases but was not completely satisfied with the results. One thing led to another and I started asking myself, “How hard can it be to make a case?” It’s been on my list of things to do for a while and I set a goal to make one by the end of our long Wisconsin winter. I recently finished and my first case and it was a completely fulfilling experience.
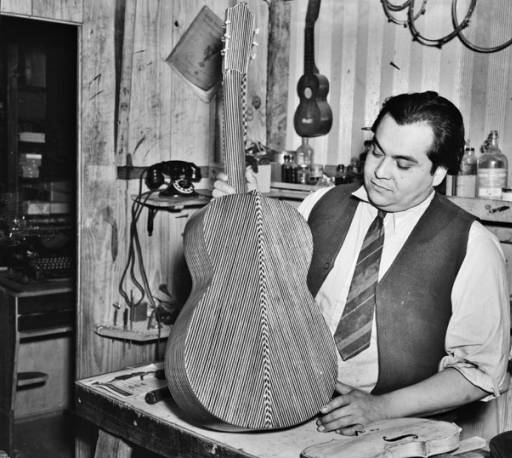
During the golden age of guitar building there were several case manufacturers, Geib, Lifton and Harptone were a few who made beautifully crafted cases. I have a few of these vintage cases which I’ve acquired with old instruments. I’ve always admired their fit and finish, and the fact that they are lightweight but still manage to offer good protection.
When I started building guitars, the Harptone company was still around and I ordered a few cases from them for my small bodied, long scale Angelina 12 string. I found Harptone to be a pleasure to deal with. I didn’t have to wait long to get the cases that I ordered, and their price was very reasonable. Not long after that Harptone was bought out by a large case manufacturer. The next time I had to order some custom cases I ordered them from this company. I found this to be the antithesis of my Harptone experience. The price had increased significantly, though it was still reasonable, but the wait was a killer. Initially I was told that there would be a six week wait, which is reasonable. After I hadn’t heard from them in six weeks, I waited a couple weeks and called. I was told that they had a stitching machine down and it would be two more weeks. Two weeks came and went and still no cases. I’ll spare you all the details, but it took about six months to get my cases. Maybe it was the former project manager in me, but I have very little patience for suppliers who can’t accurately predict their lead time. Also, at the time I was starting out as a guitar builder and really needed to get paid for the guitars I had built for my customers. Without a case I couldn’t get paid. The whole thing was also making me look bad, each time I was told “two weeks”by the case company, I would tell this to the customer, only to have both of our hopes dashed two weeks later. I knew the reality of the situation was that my 2-3 custom cases were being kicked down the line for a major manufacturers 100- 1000 case order. I fell for this twice. The second time I ended up shipping the guitars in over sized cases, then when the custom cases came in, I shipped them to the customer. So, in the end, I had to buy two cases and pay for twice the shipping. I considered this a horrible option and decided that I would never order a custom case from this company again.
My next step was to move to a company headquartered in my great state of Wisconsin. I ordered a few cases and the lead time and price were both reasonable. I found their service to be very good and I remarked that when the cases were done, I’d like to pick them up and check out the facility. I was then told that the cases were not built in Wisconsin, that they were made in Costa Rica. I was a little disappointed about that as I like to buy things that are made in the U.S. when possible. Nevertheless, the cases did come on time and they were well made. In the end though I found them to be on the large side and a little clunky. The size of these cases, and an incident where the crushed velvet interior imprinted into a varnish finish eventually caused me to explore the next option.
My last move was to start retrofitting over sized dreadnought cases. I would use a 4 1/2” block of foam, cut it to the shape of the interior of the case, cut out the shape of the guitar body, then cover it with material that best matched the interior of the case. This option didn’t require much lead time and was reasonable in terms of price, but I wasn’t completely happy with it. It did give me a taste of upholstering, and started the wheels turning about making a case for myself. I put it on the list of things to learn, along with making my own tuning machines (though infinitely more approachable), and set the goal to make a case over the winter.
Another thing has happened in the case world that gave me an extra kick. Cases that I was getting stock were getting harder to acquire. For years I’ve ordered Canadian made cases from a local distributor. Recently the Canadian company was acquired by the same large American company who acquired Harptone years ago and who I had such difficulties with. My local distributor was no longer able to get these cases, prices increased by 30%, and I was told that some case sizes, which I had been getting for years, were no longer available. My only option for these sizes was Chinese made cases. I tried the Chinese cases years ago but stopped when a customer informed me that all of the latches were coming off his Chinese case because the material the rivets were made of was too soft to hold the latches in place.
As winter was waning I realized I had to get on the project. I have a couple orders for guitars that will require custom cases and would like to send them out in something I was satisfied with. It was time to take matters into my own hands.
One of the bonuses of making my own case was that I could make them any way I liked. As with my guitars I looked toward the past, back to the old Geib and Lifton cases that I had in my collection. I started to draw up a plan for the case I wanted to build.
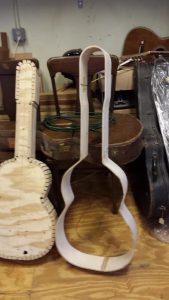
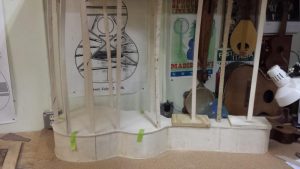
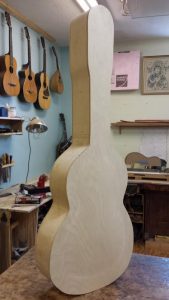
The next step was to figure out how I was going to build it. For this I looked at the old cases, looking at places where the fabric had worn away, trying to decipher what the materials were and trying to envision the process. I spoke with some woodworker friends about bending veneers and plywood. I looked into getting 1/16″ veneers, which is what was used on the old cases, but they are not easy to come by and the ones I did see were quite pricey. I looked into bending plywood, but didn’t find it to be very stable. I settled on 1/8″ Baltic birch plywood, which was readily available, had adequate flexibility, but also had the rigidity I was looking for. I found that it was used by skateboard makers and also experimental aircraft builders, and that it bent like a dream with heat. Laminating two layers of the 1/8″ ply would give me a finished thickness of 1/4″. It would give me a nicely protective shell.
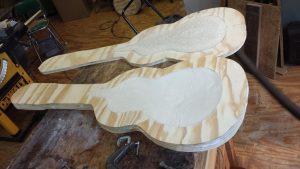
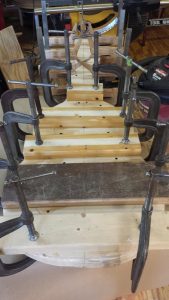
Now that I had figured out my material for the shell, I had to figure out my process for making it. I did some searching on the web and came up with a website by Steve Kirtley, which is dedicated to vintage musical instrument cases. In addition to providing histories of the companies, Steve provides examples of case repair and outlines how to make vintage inspired case. The arching of the top of the case was especially puzzling and intimidating to me. Initially I was thinking of using a vacuum press for this step, but a skateboard making friend assured me that a vacuum press would not provide adequate pressure, that I had to use a male and female mold with lots of clamping pressure. Steve shows his process for doing this on his site, making a mold for arching the top, using particle board for the positive part of the shape, and using plaster or Paris to cast the negative part of the mold. The thing I really love about this process is that it does not require any fancy woodworking equipment, other than a bunch of large clamps. It is relatively low tech, but beautiful, from a craft perspective.
I contacted Steve Kirtley as I was working on the shell. I had many questions for him the further I dug into the project. I was wondering about materials, hardware, process etc. Steve suggested that I post the questions on a Facebook group that he started, Vintage Musical Instrument Cases, and suggested that the open forum could help me through the process. As things came up, and as I completed different stages of the case, I posted photos and questions on the group and everyone was supportive and helpful. It was a great resource for me and I thank everyone there for their input. I especially thank Steve for being open with information and resources.
As I got the shell together, my thoughts started moving on to the upholstery. I had a little experience from relining cases, but in the scheme of things it didn’t add up to much. For the exterior, I was looking for something that matched the material on the old cases. I ended up getting some upholstery material from a local fabric store. Initially I tried to adhere the material using contact cement, but I couldn’t take the fumes and it was causing my material to curl up into itself. On Steve’s advice, I switched to using a water based contact cement. The fumes from this were minimal and it really worked great for adhering the material to the shell. In hindsight, and on Steve’s suggestion, I will use Tolex material in the future. It’s made for this application and has several advantages over standard upholstery material.
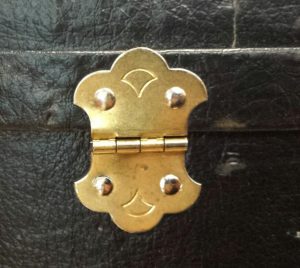
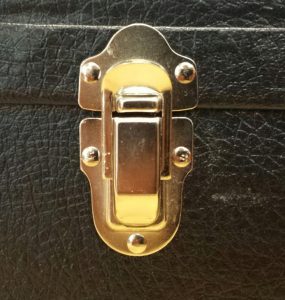
After I had completed the exterior I had to find the hardware. I found some nice butterfly hinges on ebay, similar enough to the old style ones. I opted for more traditional latches over the drawbolts which are used on more modern cases. These were a bit of a challenge to find, but I found some that work well enough from G&G Quality cases, who manufactures cases in Los Angeles for Fender. G&G also has nice handles for a good price. They’re not the cool old style banana handles, but they are good looking leather handles cost half the price of a banana handle. It worked well enough for my prototype. All of the hardware is attached with split rivets. There is a definite learning curve on the proper way to use a split rivet. Again, I turned to Steve Kirtley’s site, which offers a nice illustration of how to use them.
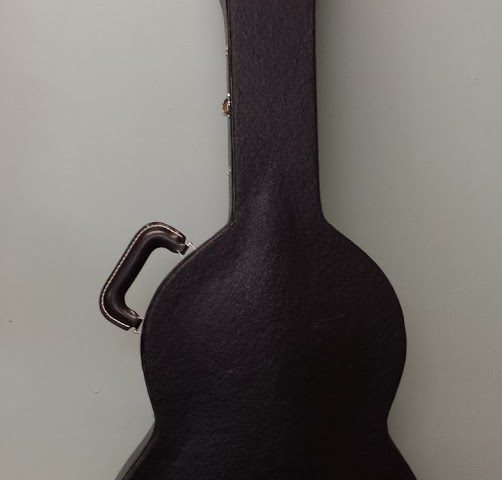
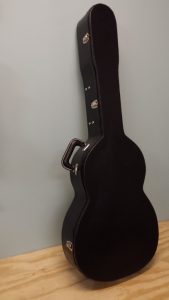
So I have successfully finished my first case. For me the process was nearly as satisfying as building a new guitar. I really enjoyed deconstructing the old cases and figuring out ways to work through each challenge as it presented itself. Overall I’m quite happy with the way that it turned out. There is some definite room for improvement and I look forward to refining the process, and finding the best sources for material and hardware. Economically it may not make the most sense in the world, at least at this point. But, having ruled out the custom cases that are available, and as stock cases get harder to come by as companies further standardize, it makes more sense for a guy that doesn’t make “standard” stuff, to make his own case. I know of few guitar builders who are satisfied with the cases that are available to them, and I encourage them to give case making a try. It’s certainly not easy and requires much dedication and persistence, but in the end it is well worth the effort.
During this whole process I was reminded of a story the great archtop builder Bill Moll once told me. He was growing frustrated with his case maker who he had worked with for years. The lead time kept increasing on the cases and he was getting bumped for bigger customers. He voiced his frustration to the case maker who’s reply was, “If you don’t like it, make your own cases.” Bill, not being a guy to back down to a challenge did just that. He now makes some of the best cases in the business, for his guitars.




4 Comments
Wonderful write-up! I enjoyed it thoroughly!
Now, onto a coffin-style case!

Great write up, thanks for sharing!
Todd, ever since you brought your first Leadbelly Stella copy to my campsite at Clifftop I've known you were a genius. Very, very, cool essay. keep up the good work!