Miguel Acosta Checkered Guitar

A Quarantine Well Spent
September 1, 2020
Luis Acosta Striped Guitar
October 15, 2021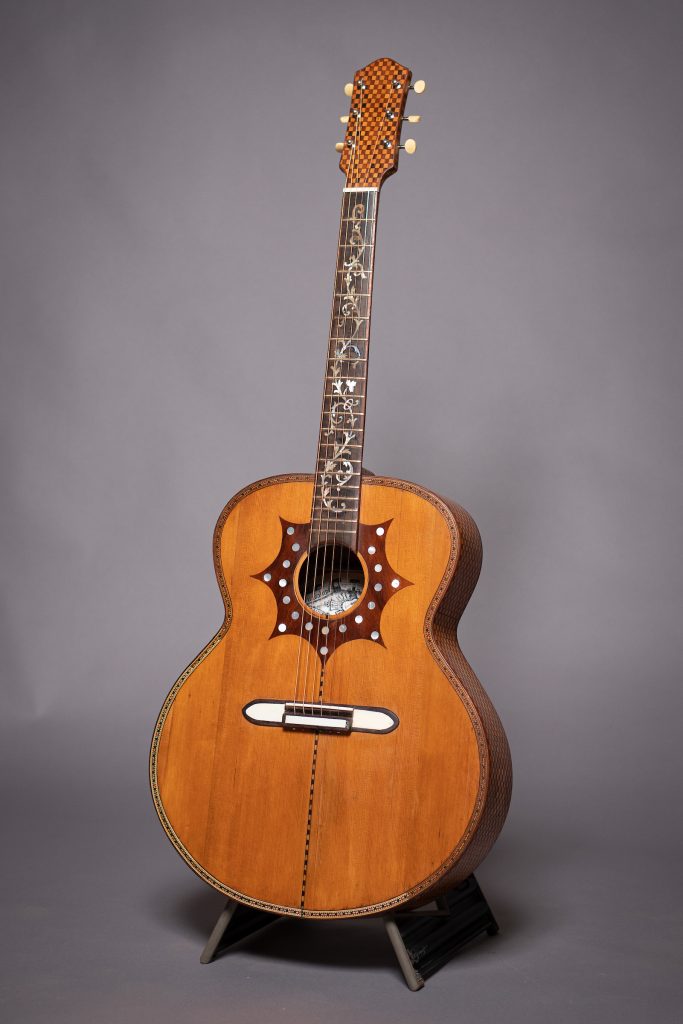
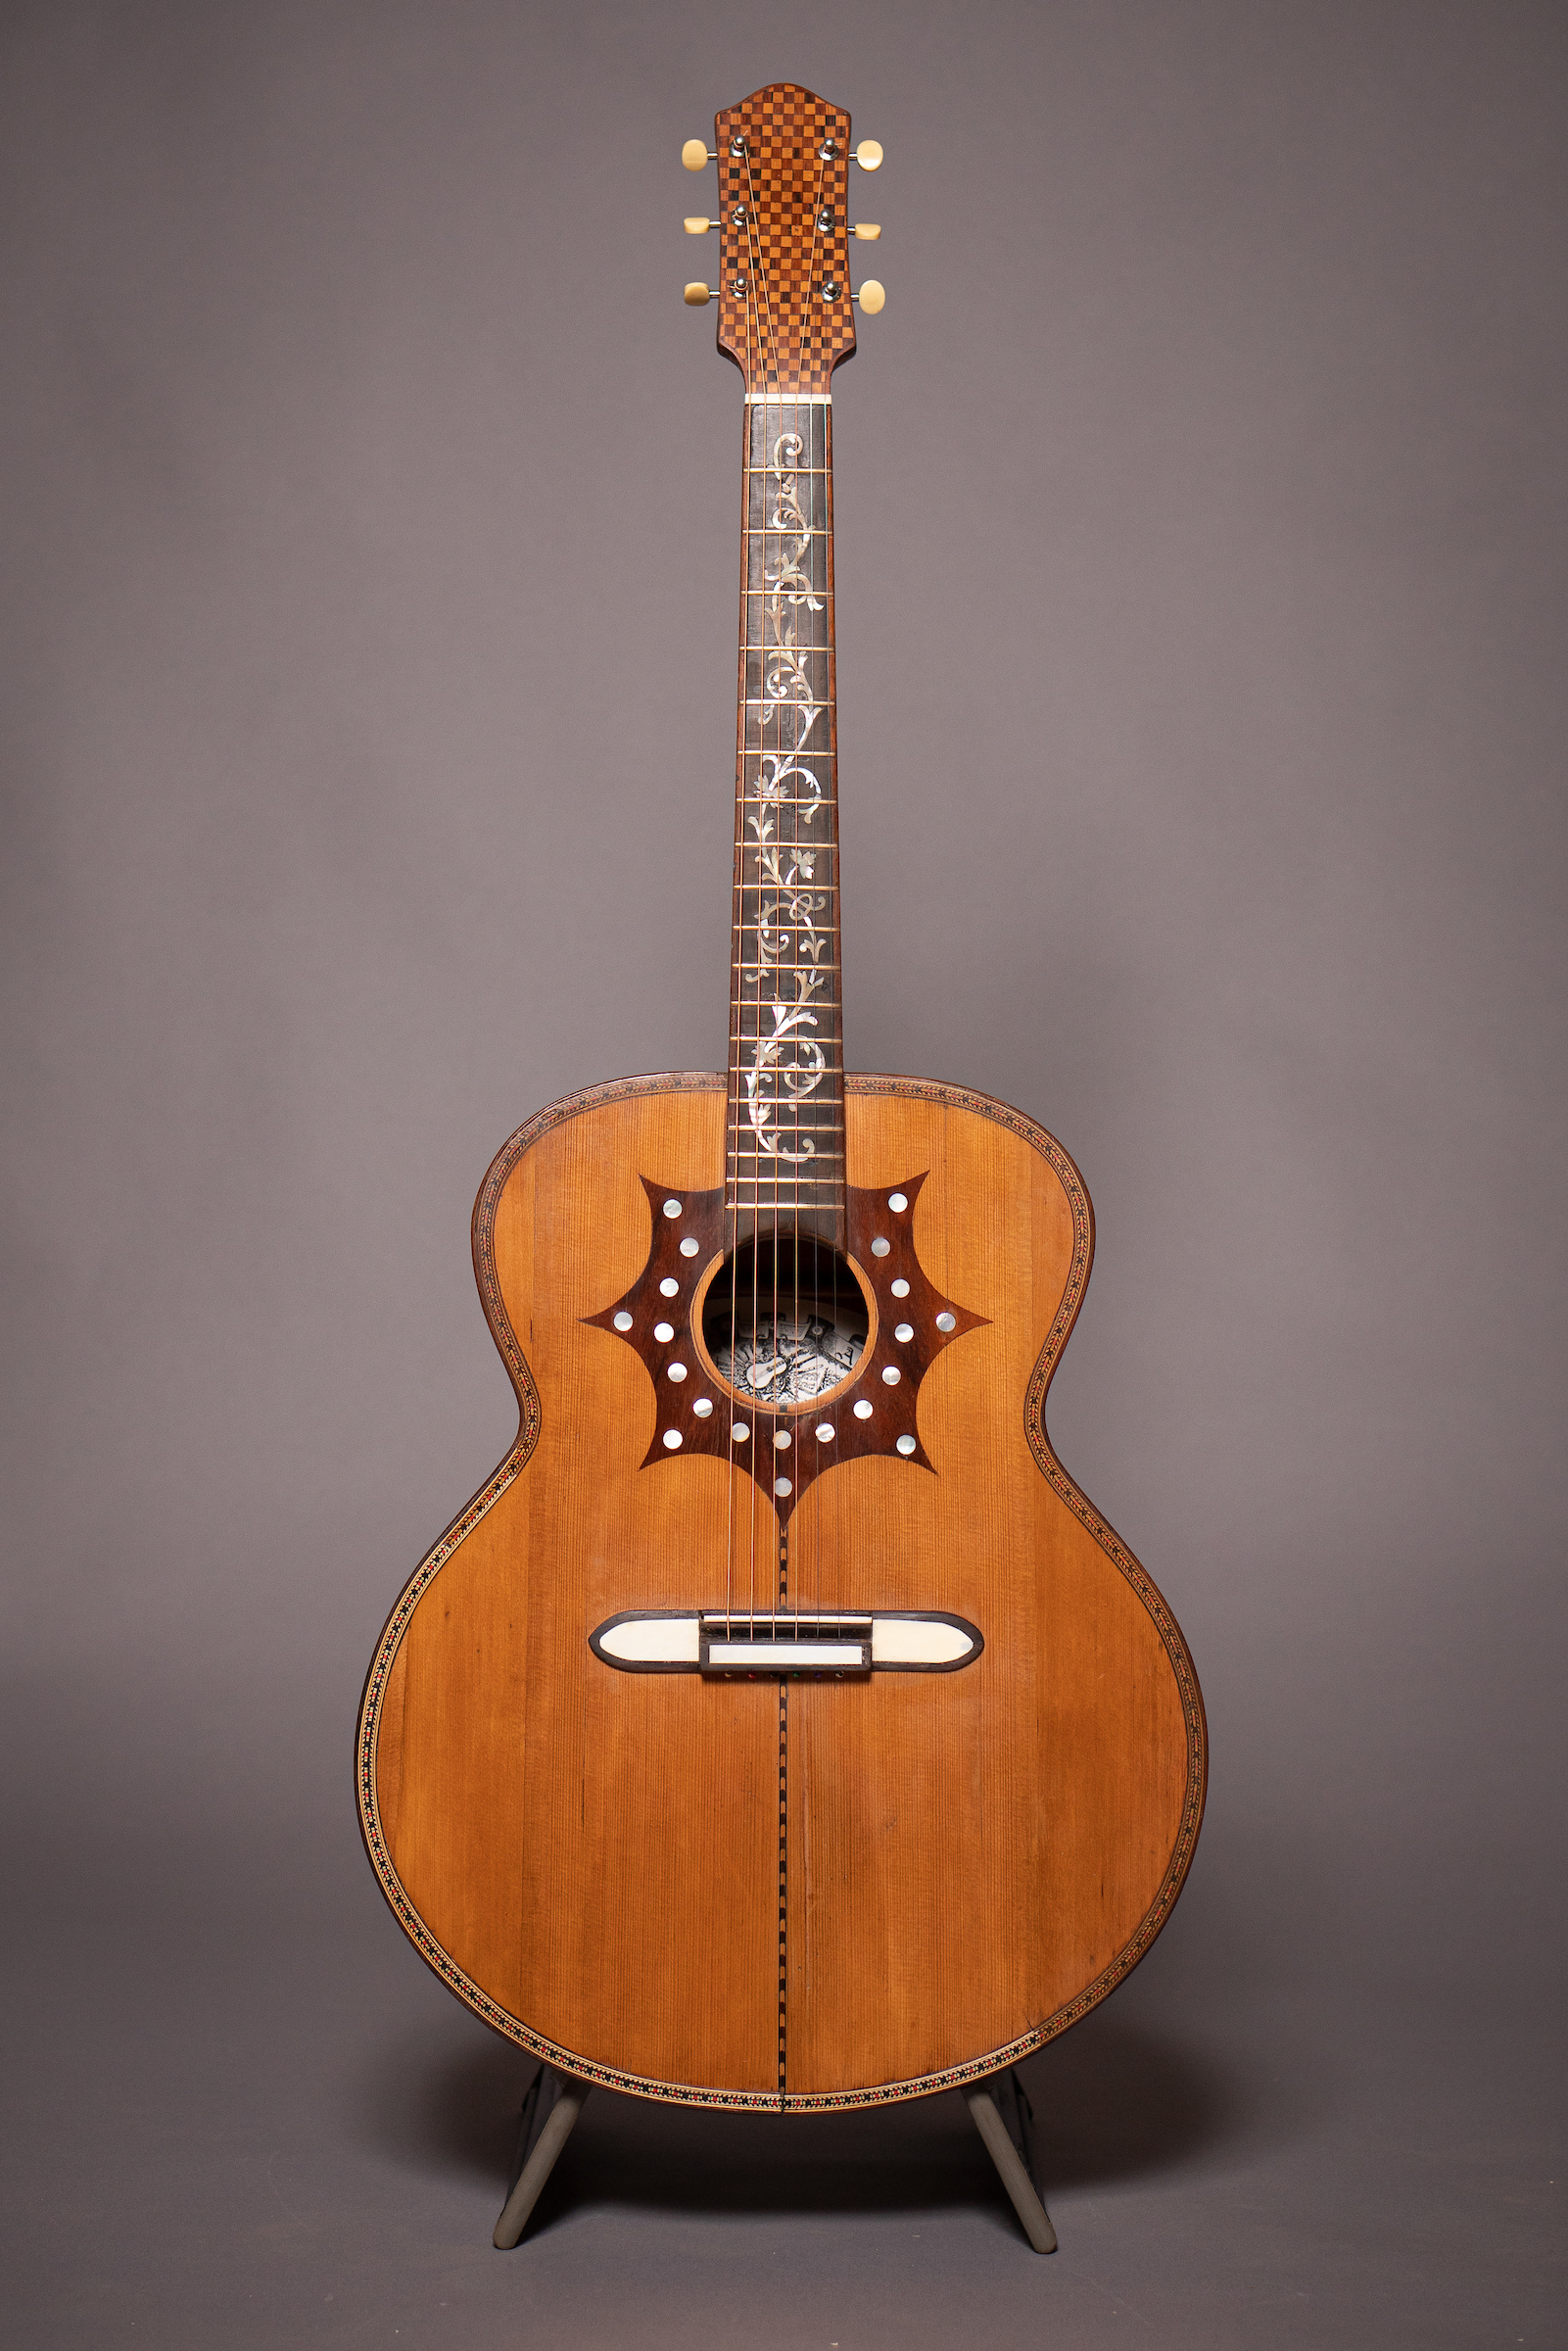
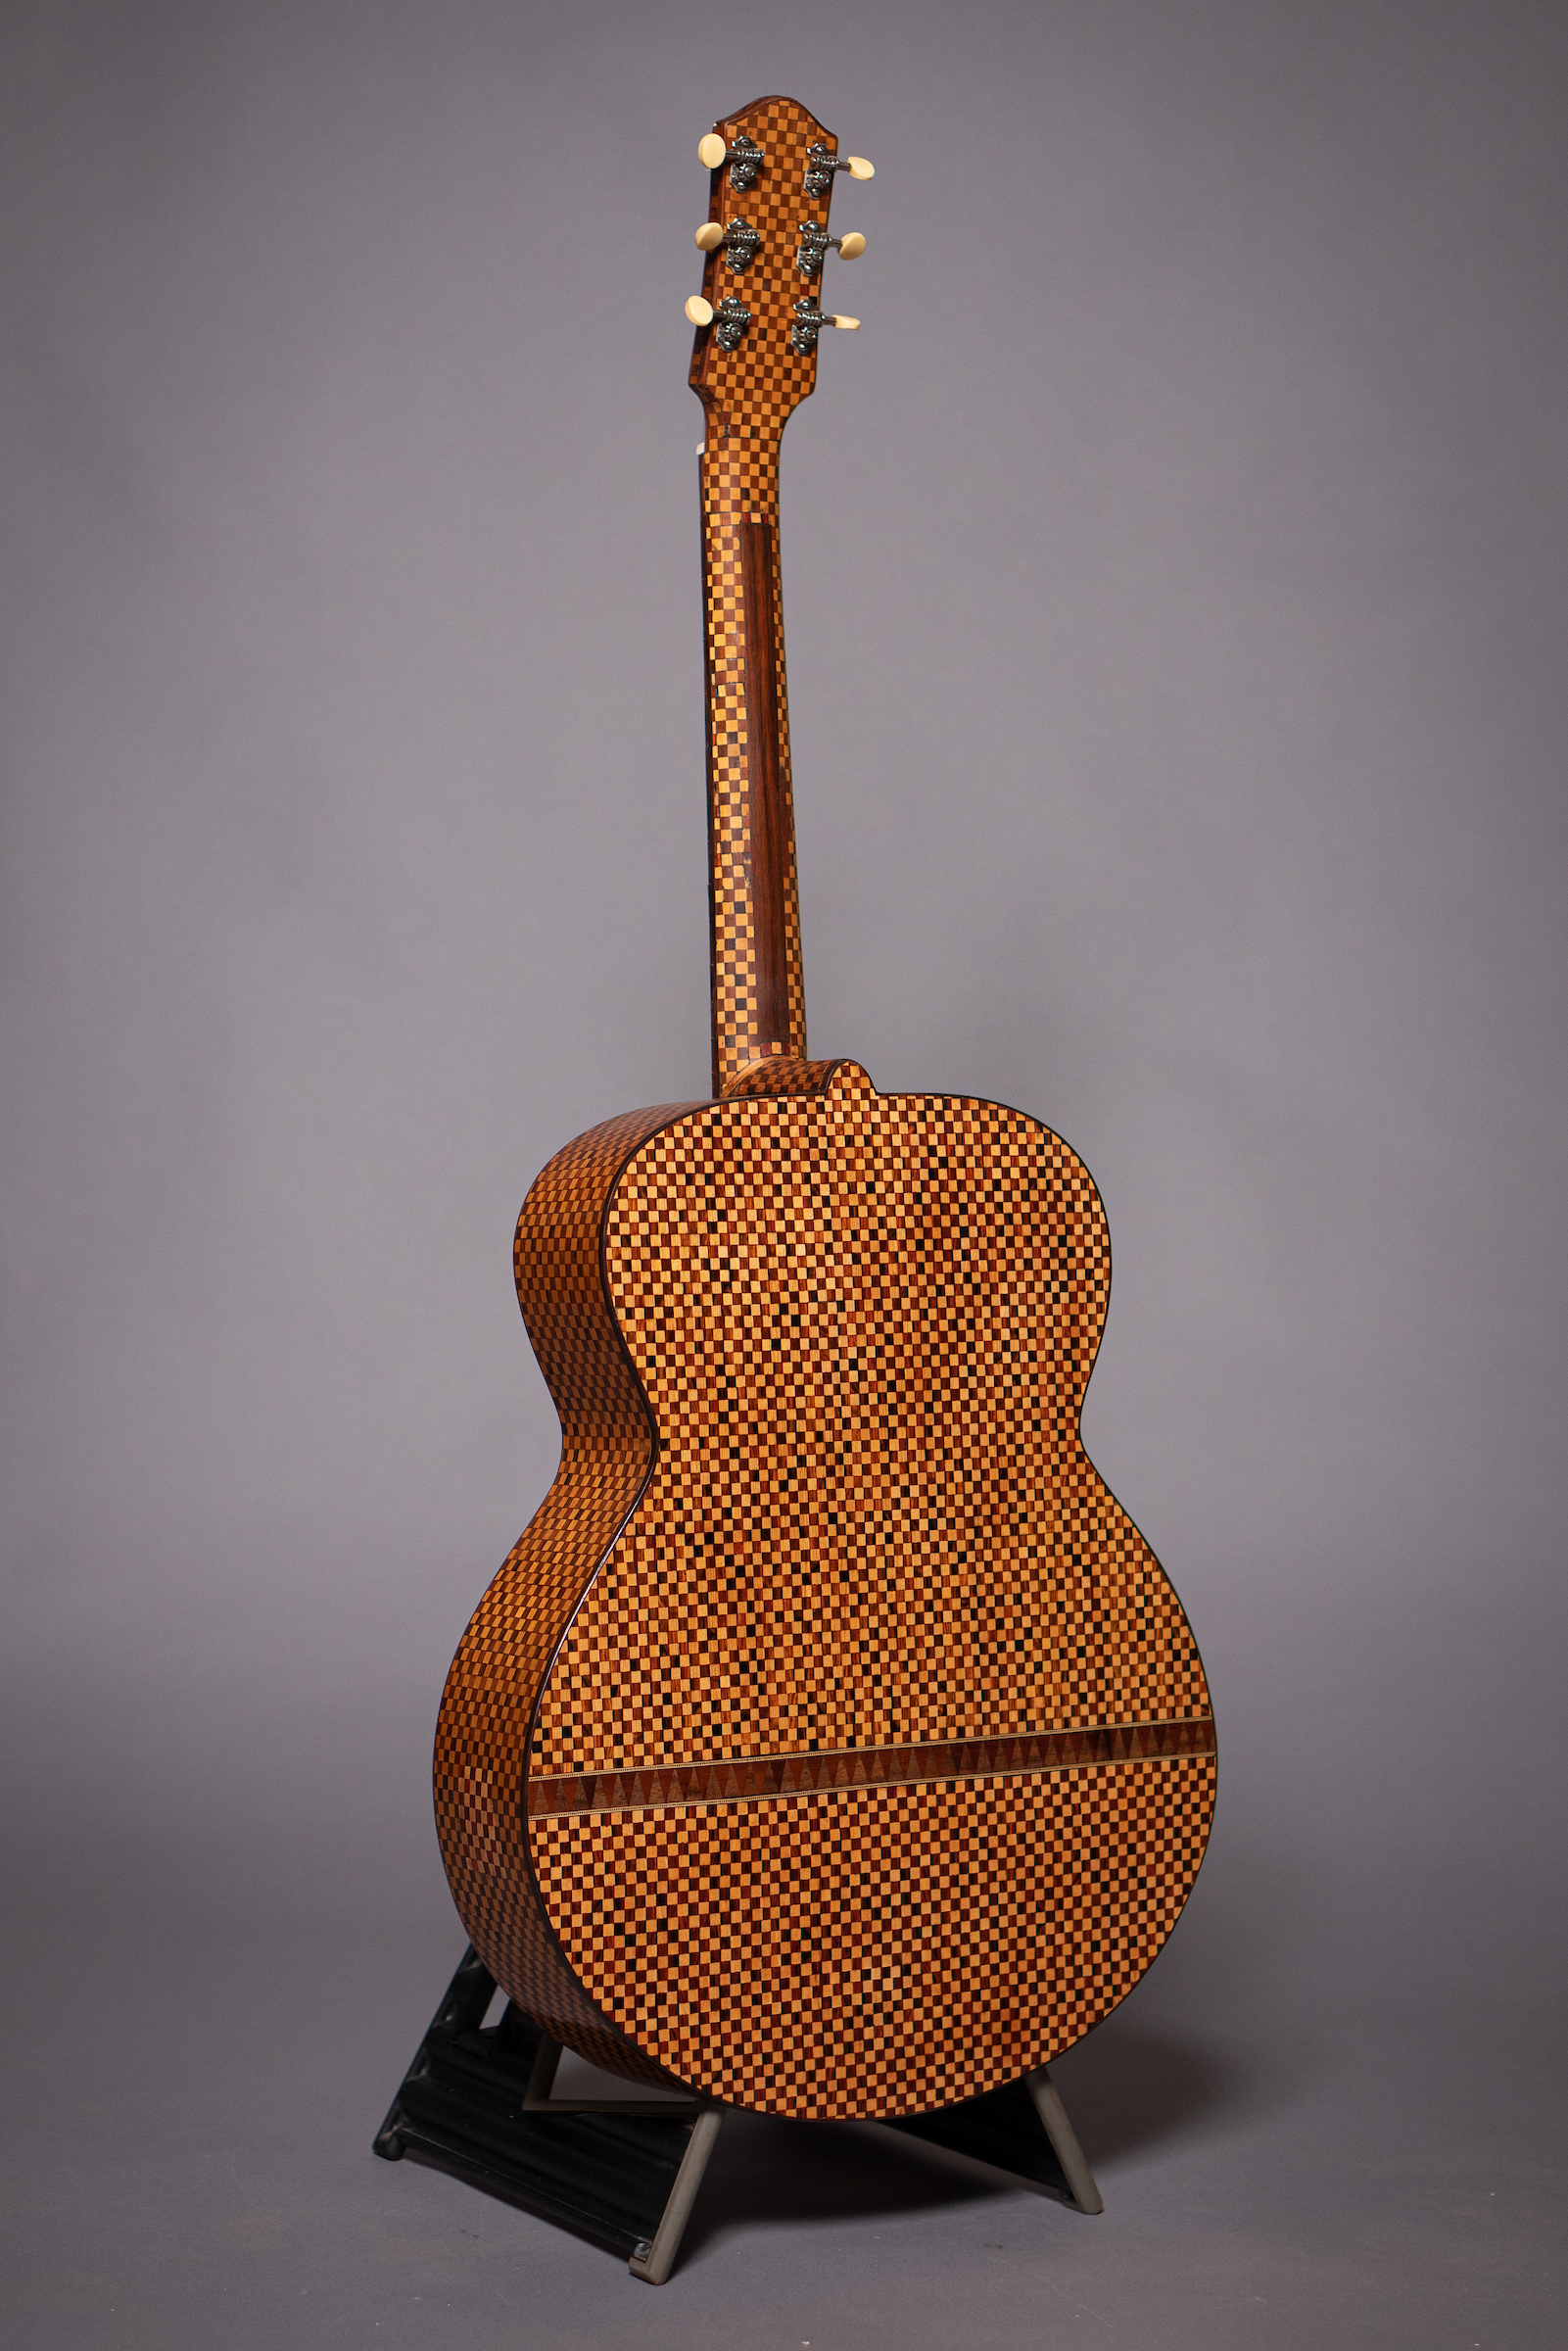
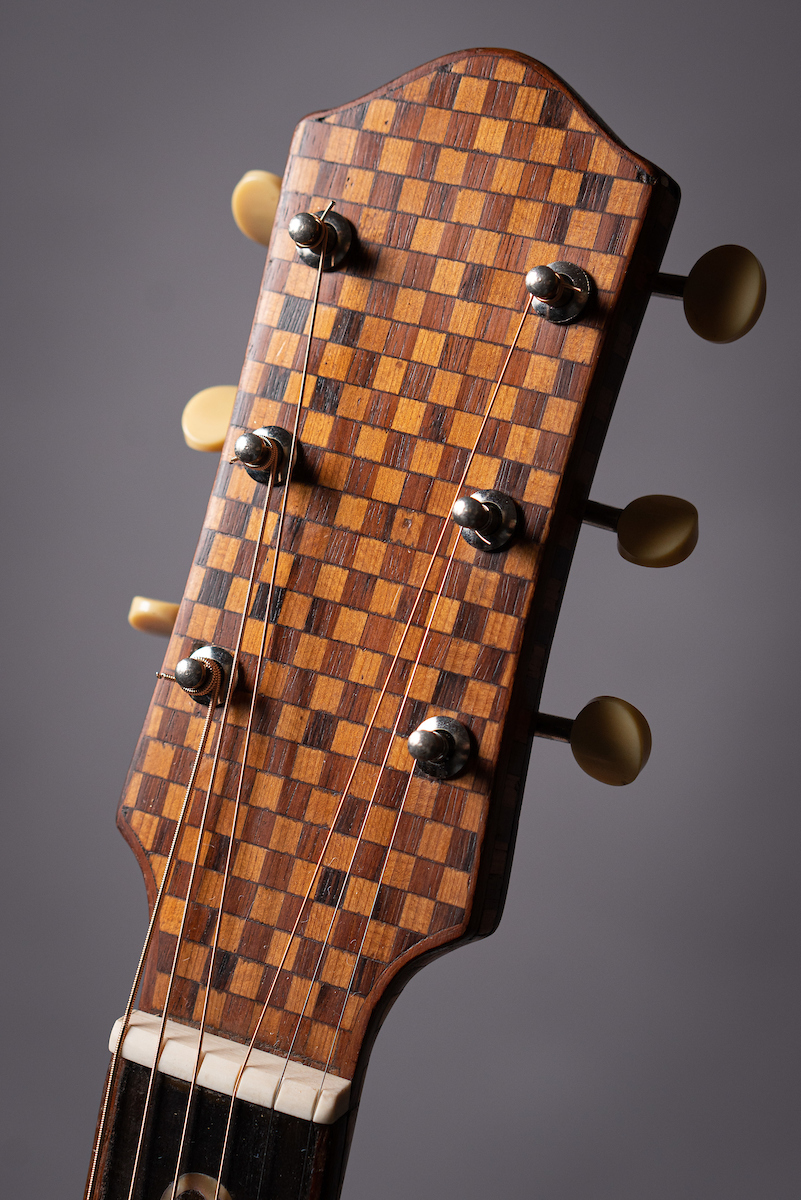
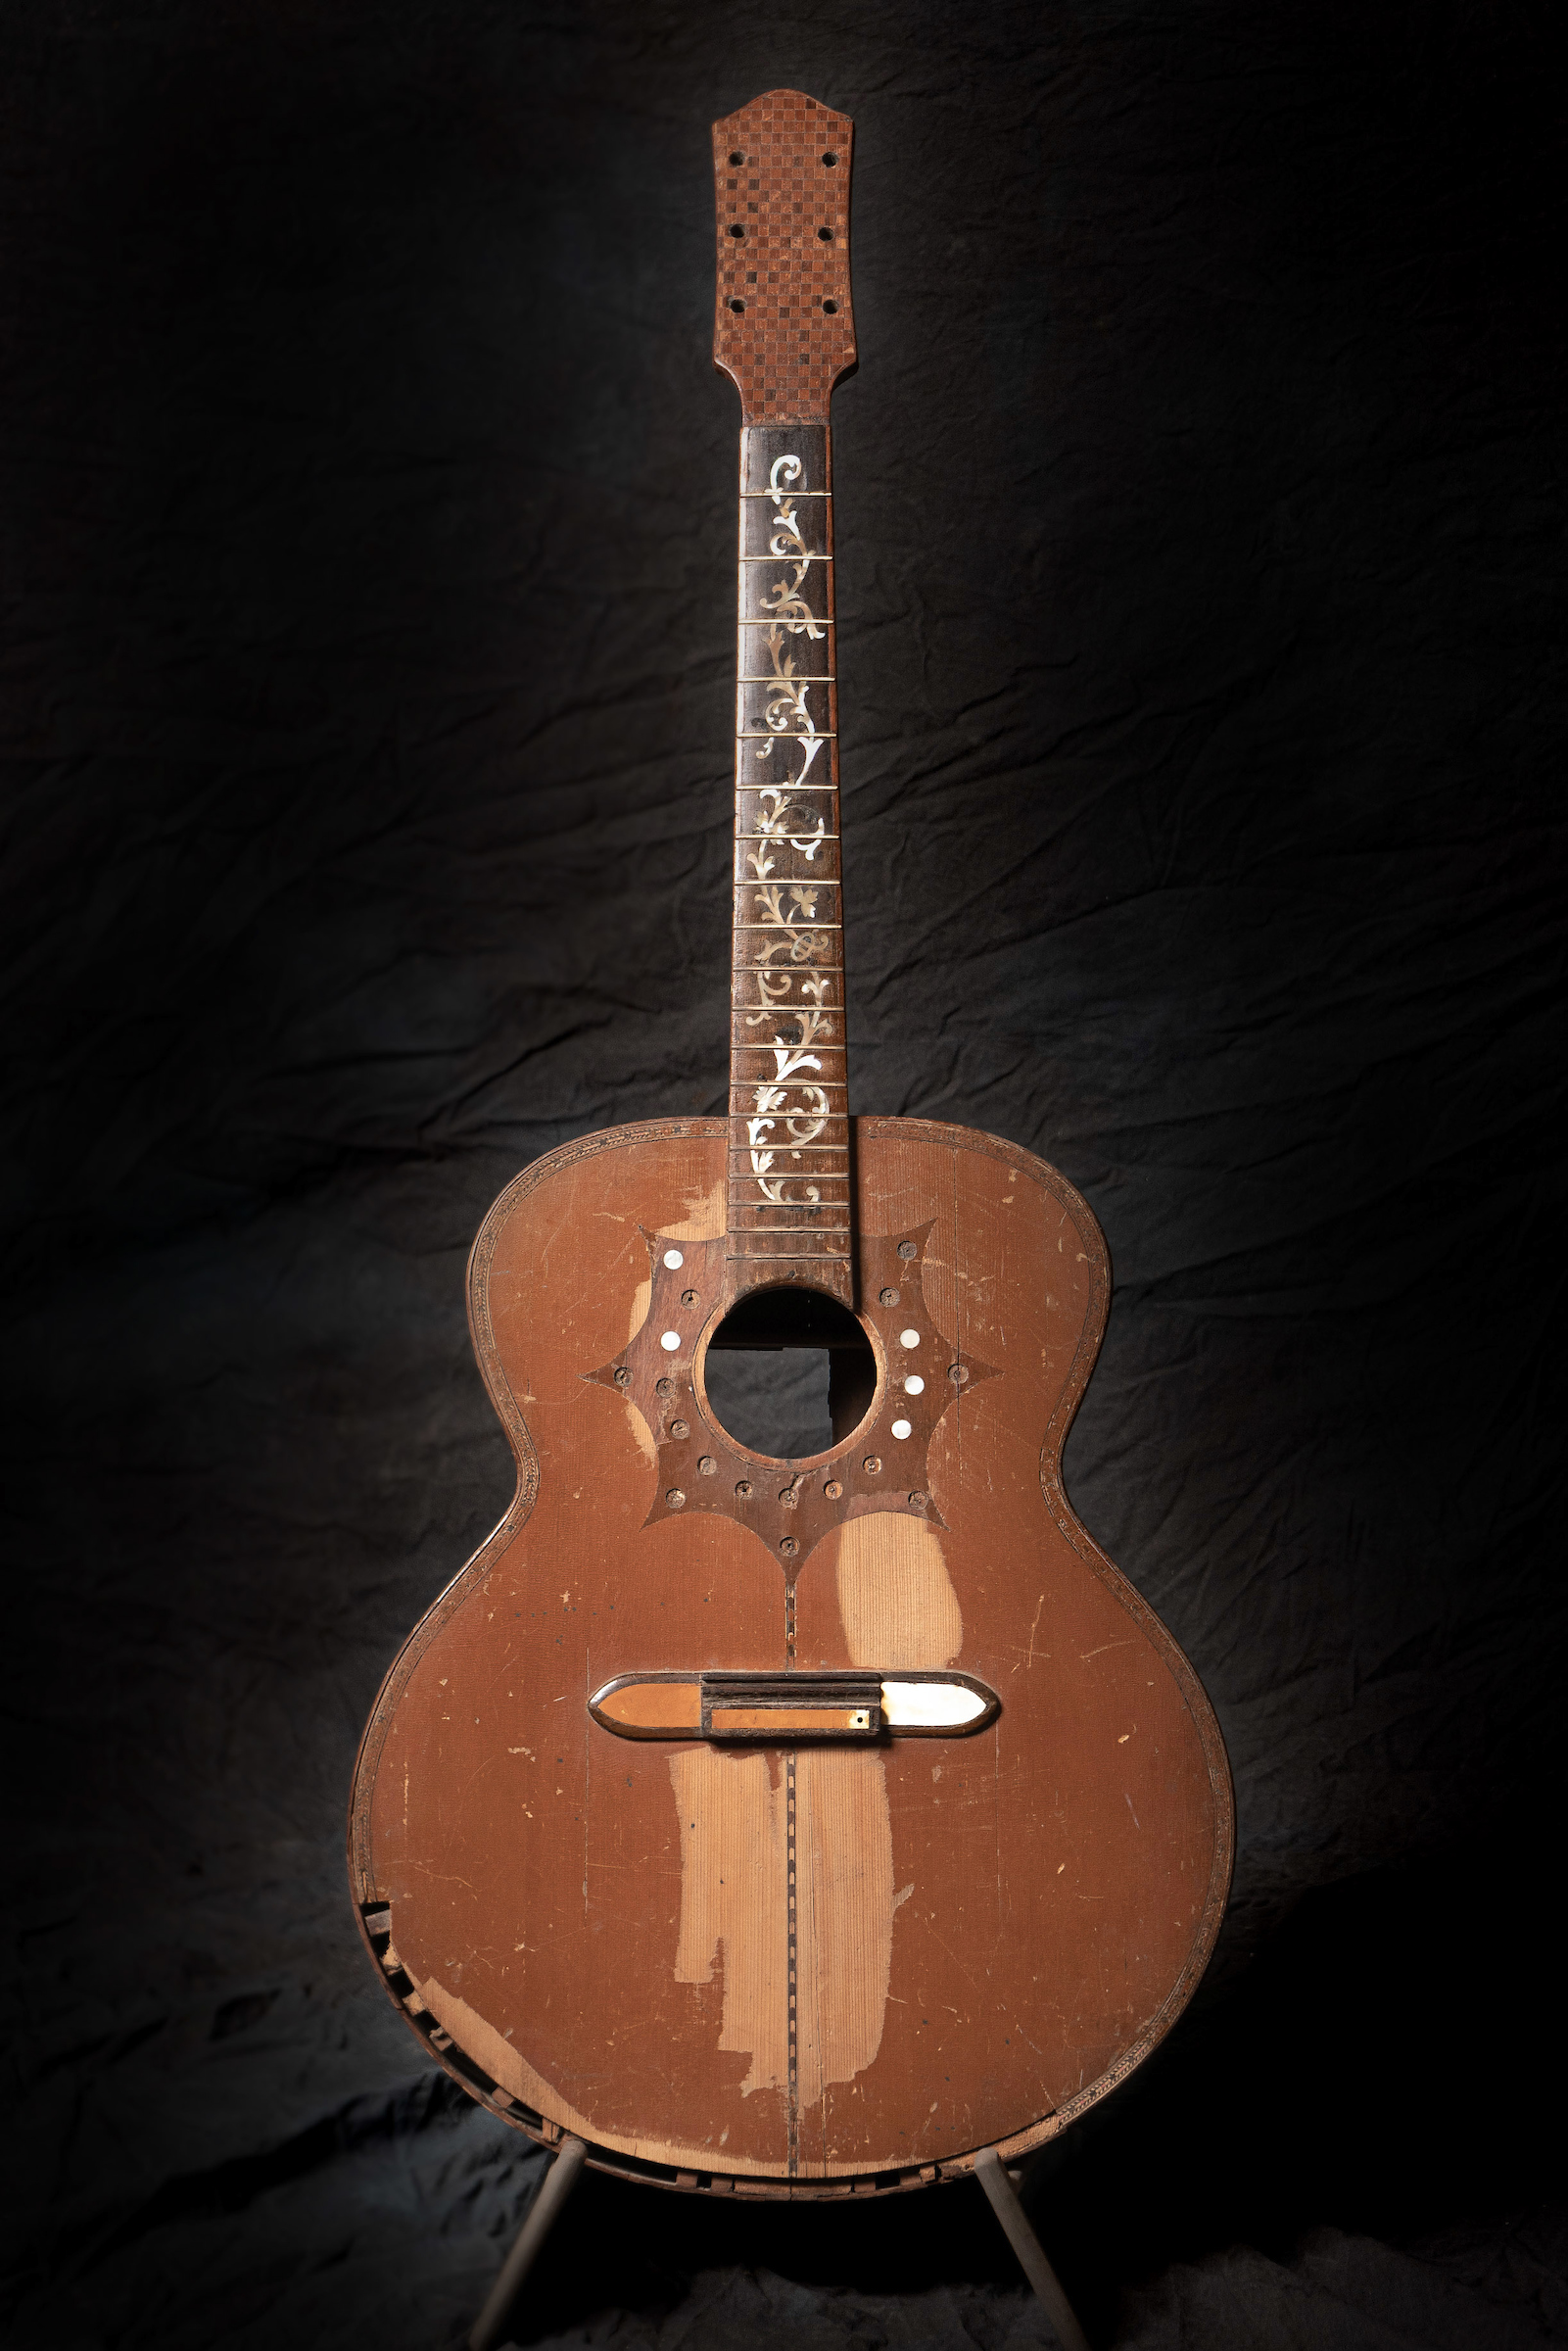
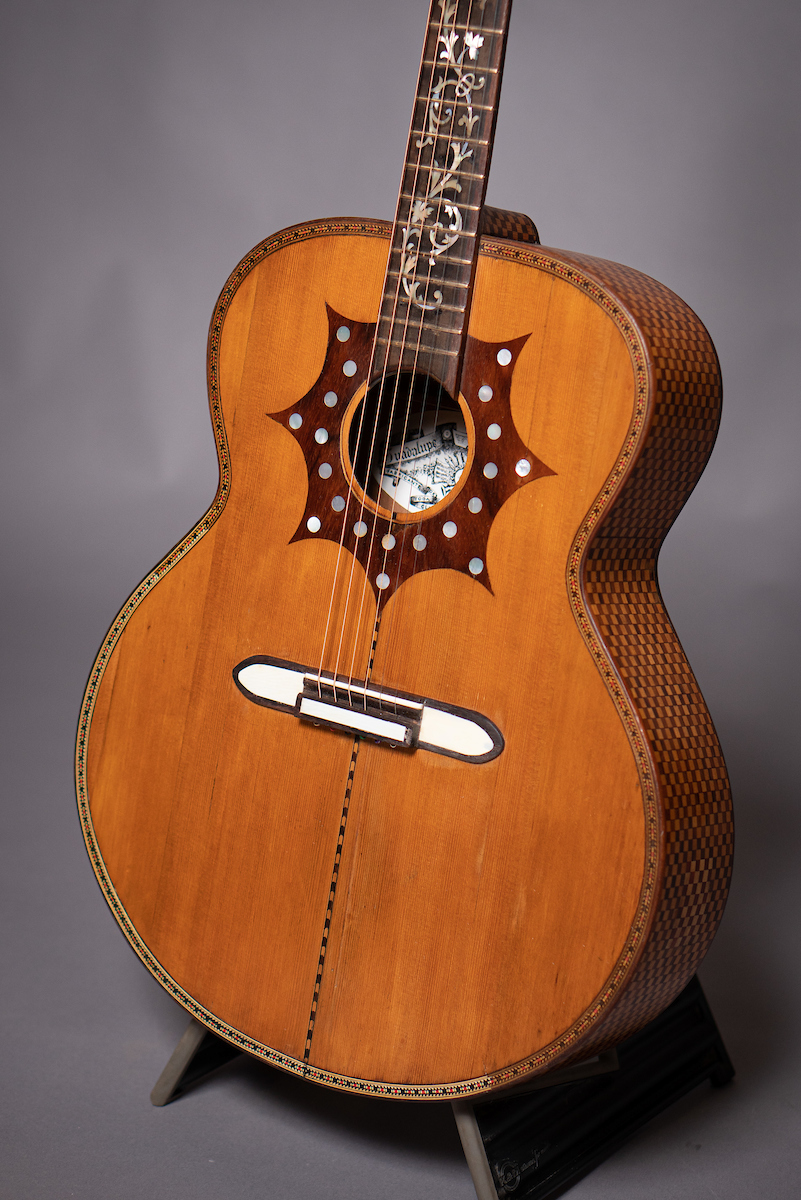
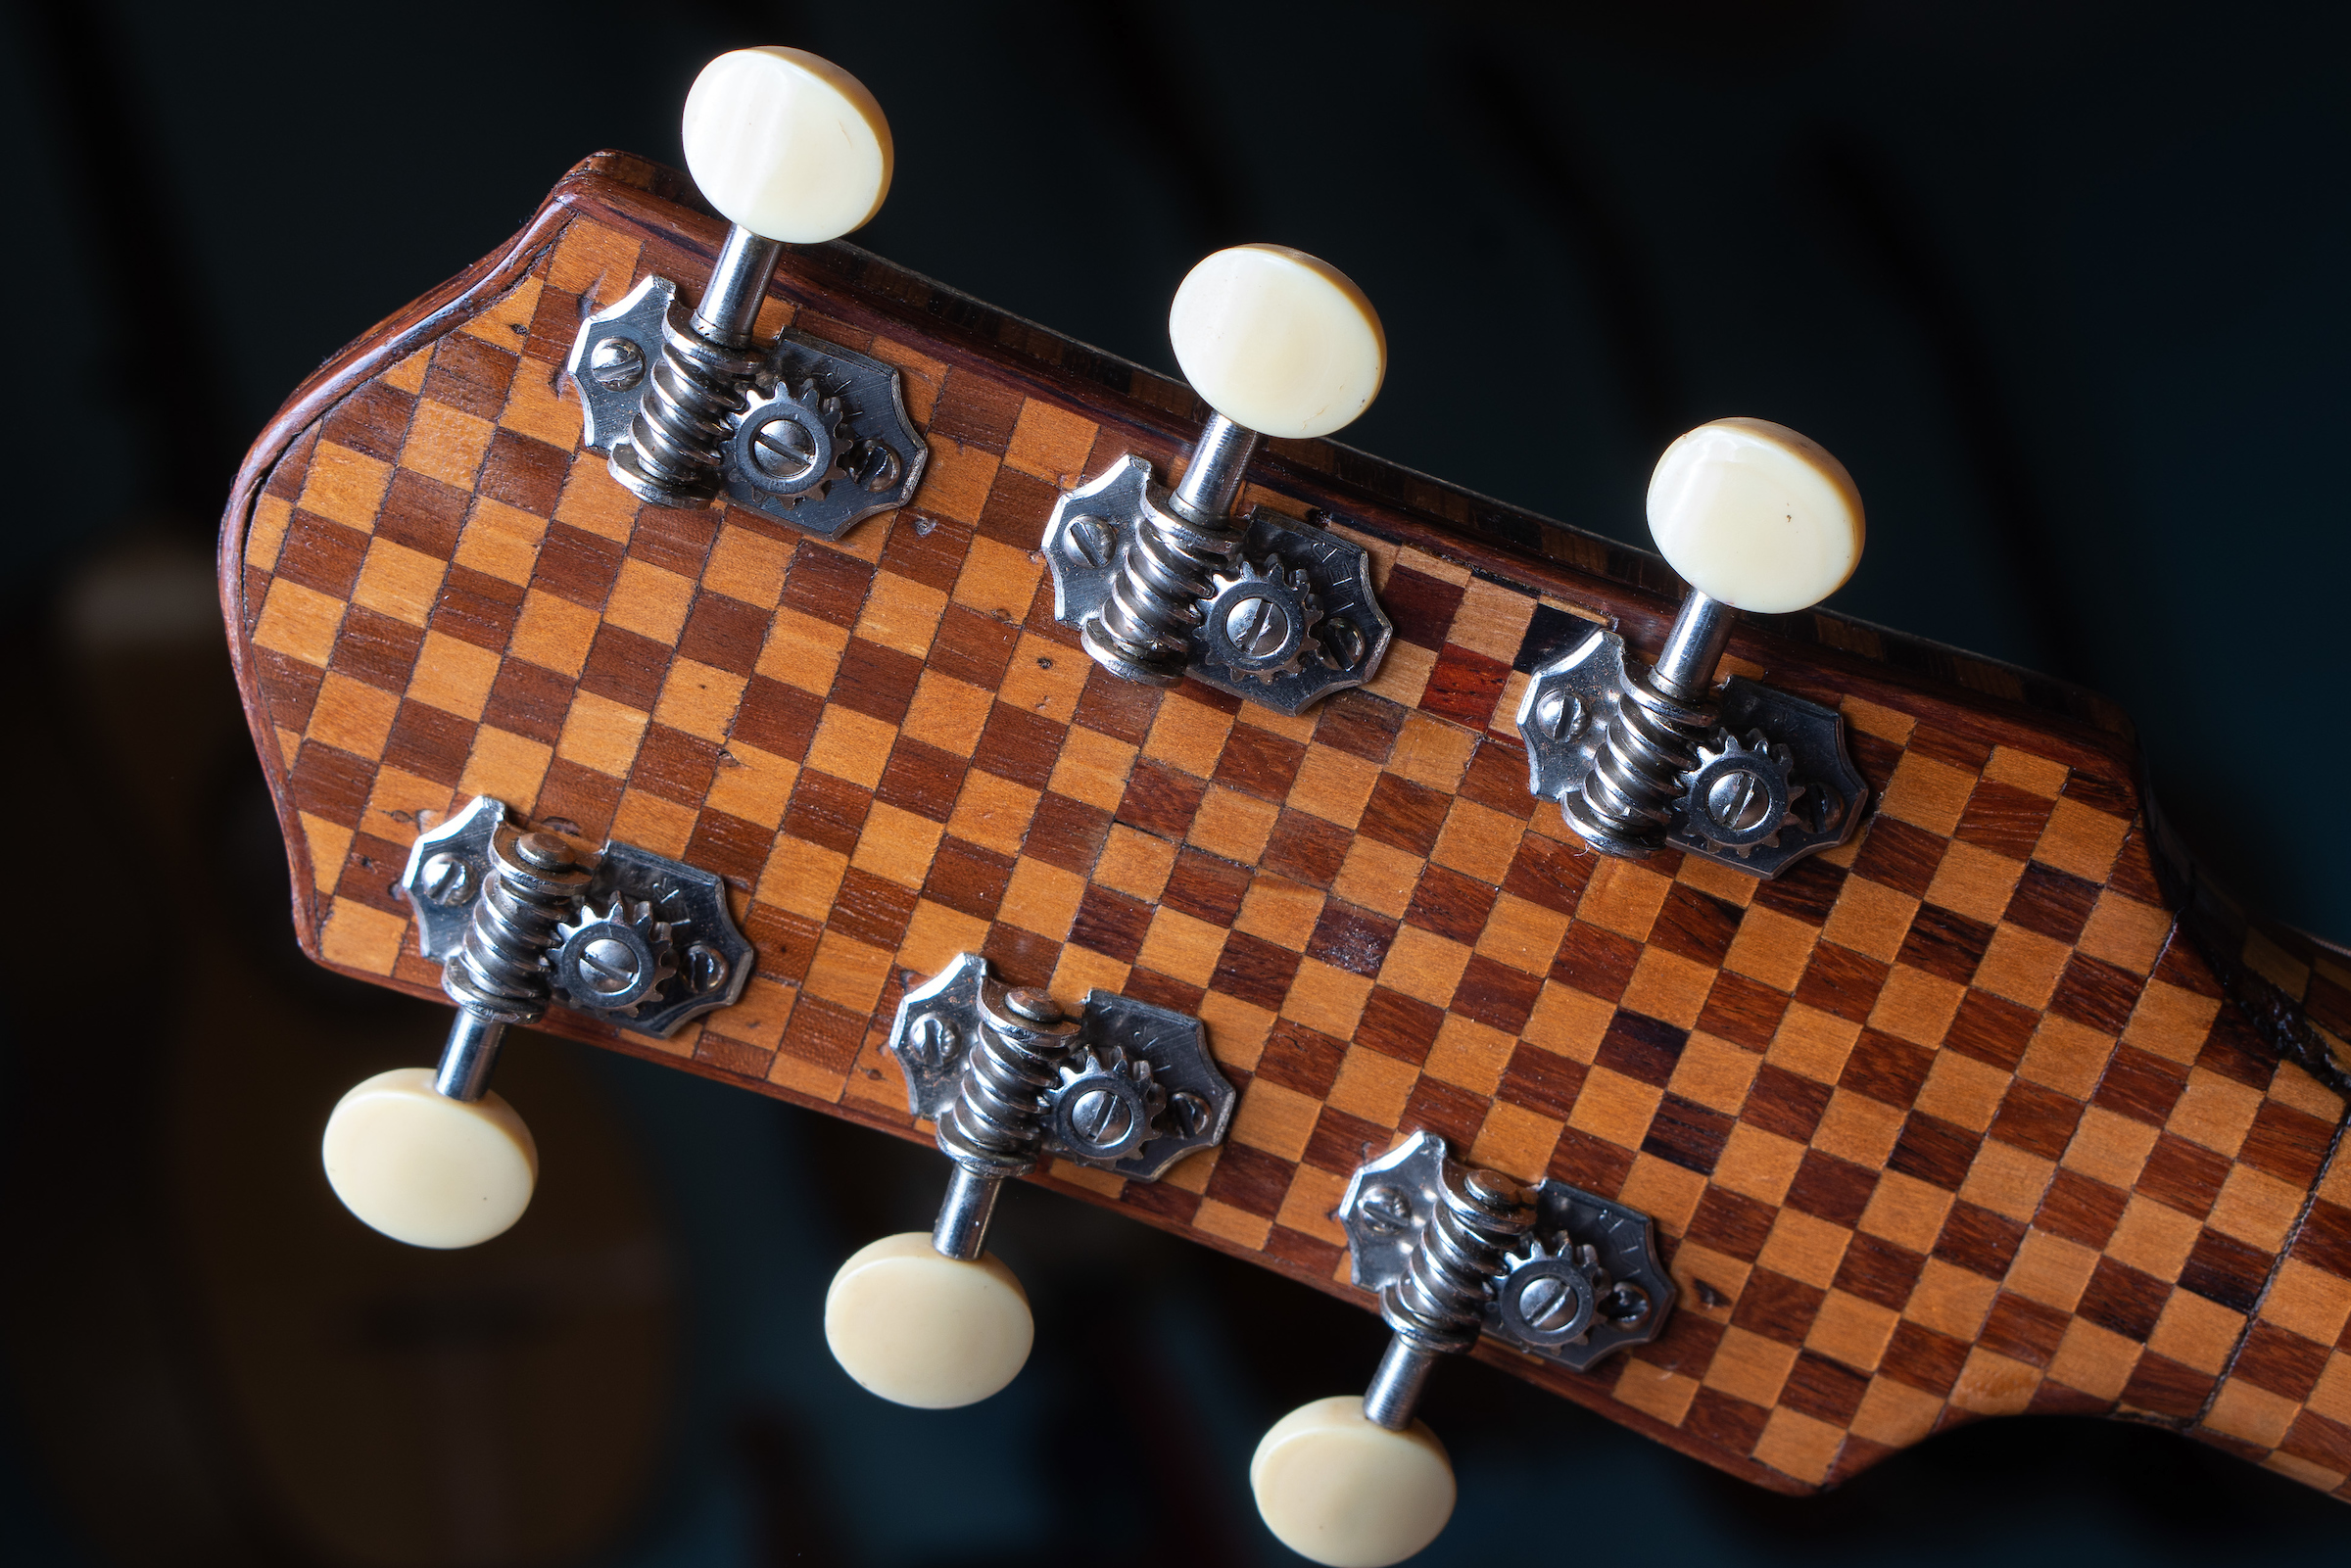
I recently completed a long term restoration of a remarkable guitar that was built by Miguel Acosta in San Antonio, Texas in the late 1930’s or early 40’s. The amazing thing about the guitar is that the back, sides and neck are made out of alternating ¼” squares of Brazilian rosewood and spruce, laid out in a checkerboard pattern. It is also notable because it is a 17” flat top with 14 frets to the body, likely patterned after a Gibson SJ-200 (SJ is short for Super Jumbo), which Gibson started making in the late 1930's. It is a beautiful marriage of traditional Mexican aesthetics and American design.
I have written about the Acostas here before. Miguel’s father, Guadalupe, owned a music store in San Antonio, which opened in 1920, and it was a hub for the city’s Mexican community and musicians. In addition to selling records, sheet music and accessories at his shop, Guadalupe sold a wide variety of instruments that he and his sons built ,and they repaired instruments of all varieties. Guadalupe Acosta built Lydia Mendoza’s early 12 string, as well as Lonnie Johnson’s. The guitar that I restored was one of a handful of fantastical instruments that his son Miguel built for himself and one that he played frequently around San Antonio. In addition to being an excellent luthier, Miguel was also a gigging musician, playing 7 days a week in his heyday, sometimes multiple times a day.
Miguel’s son, Mike Acosta, had told me about the checkered guitar during a phone call when I was researching Lydia Mendoza’s 12 string. He was trying to express to me how creative his father was. When I asked him what had happened to the guitar he said, “It fell to pieces. I can mail you a piece of it if you like.” I told him to hang onto the piece. That conversation helped me to realize that the headstock of Lonnie Johnson’s guitar was laid out as a checkerboard, a detail which had puzzled me for years.
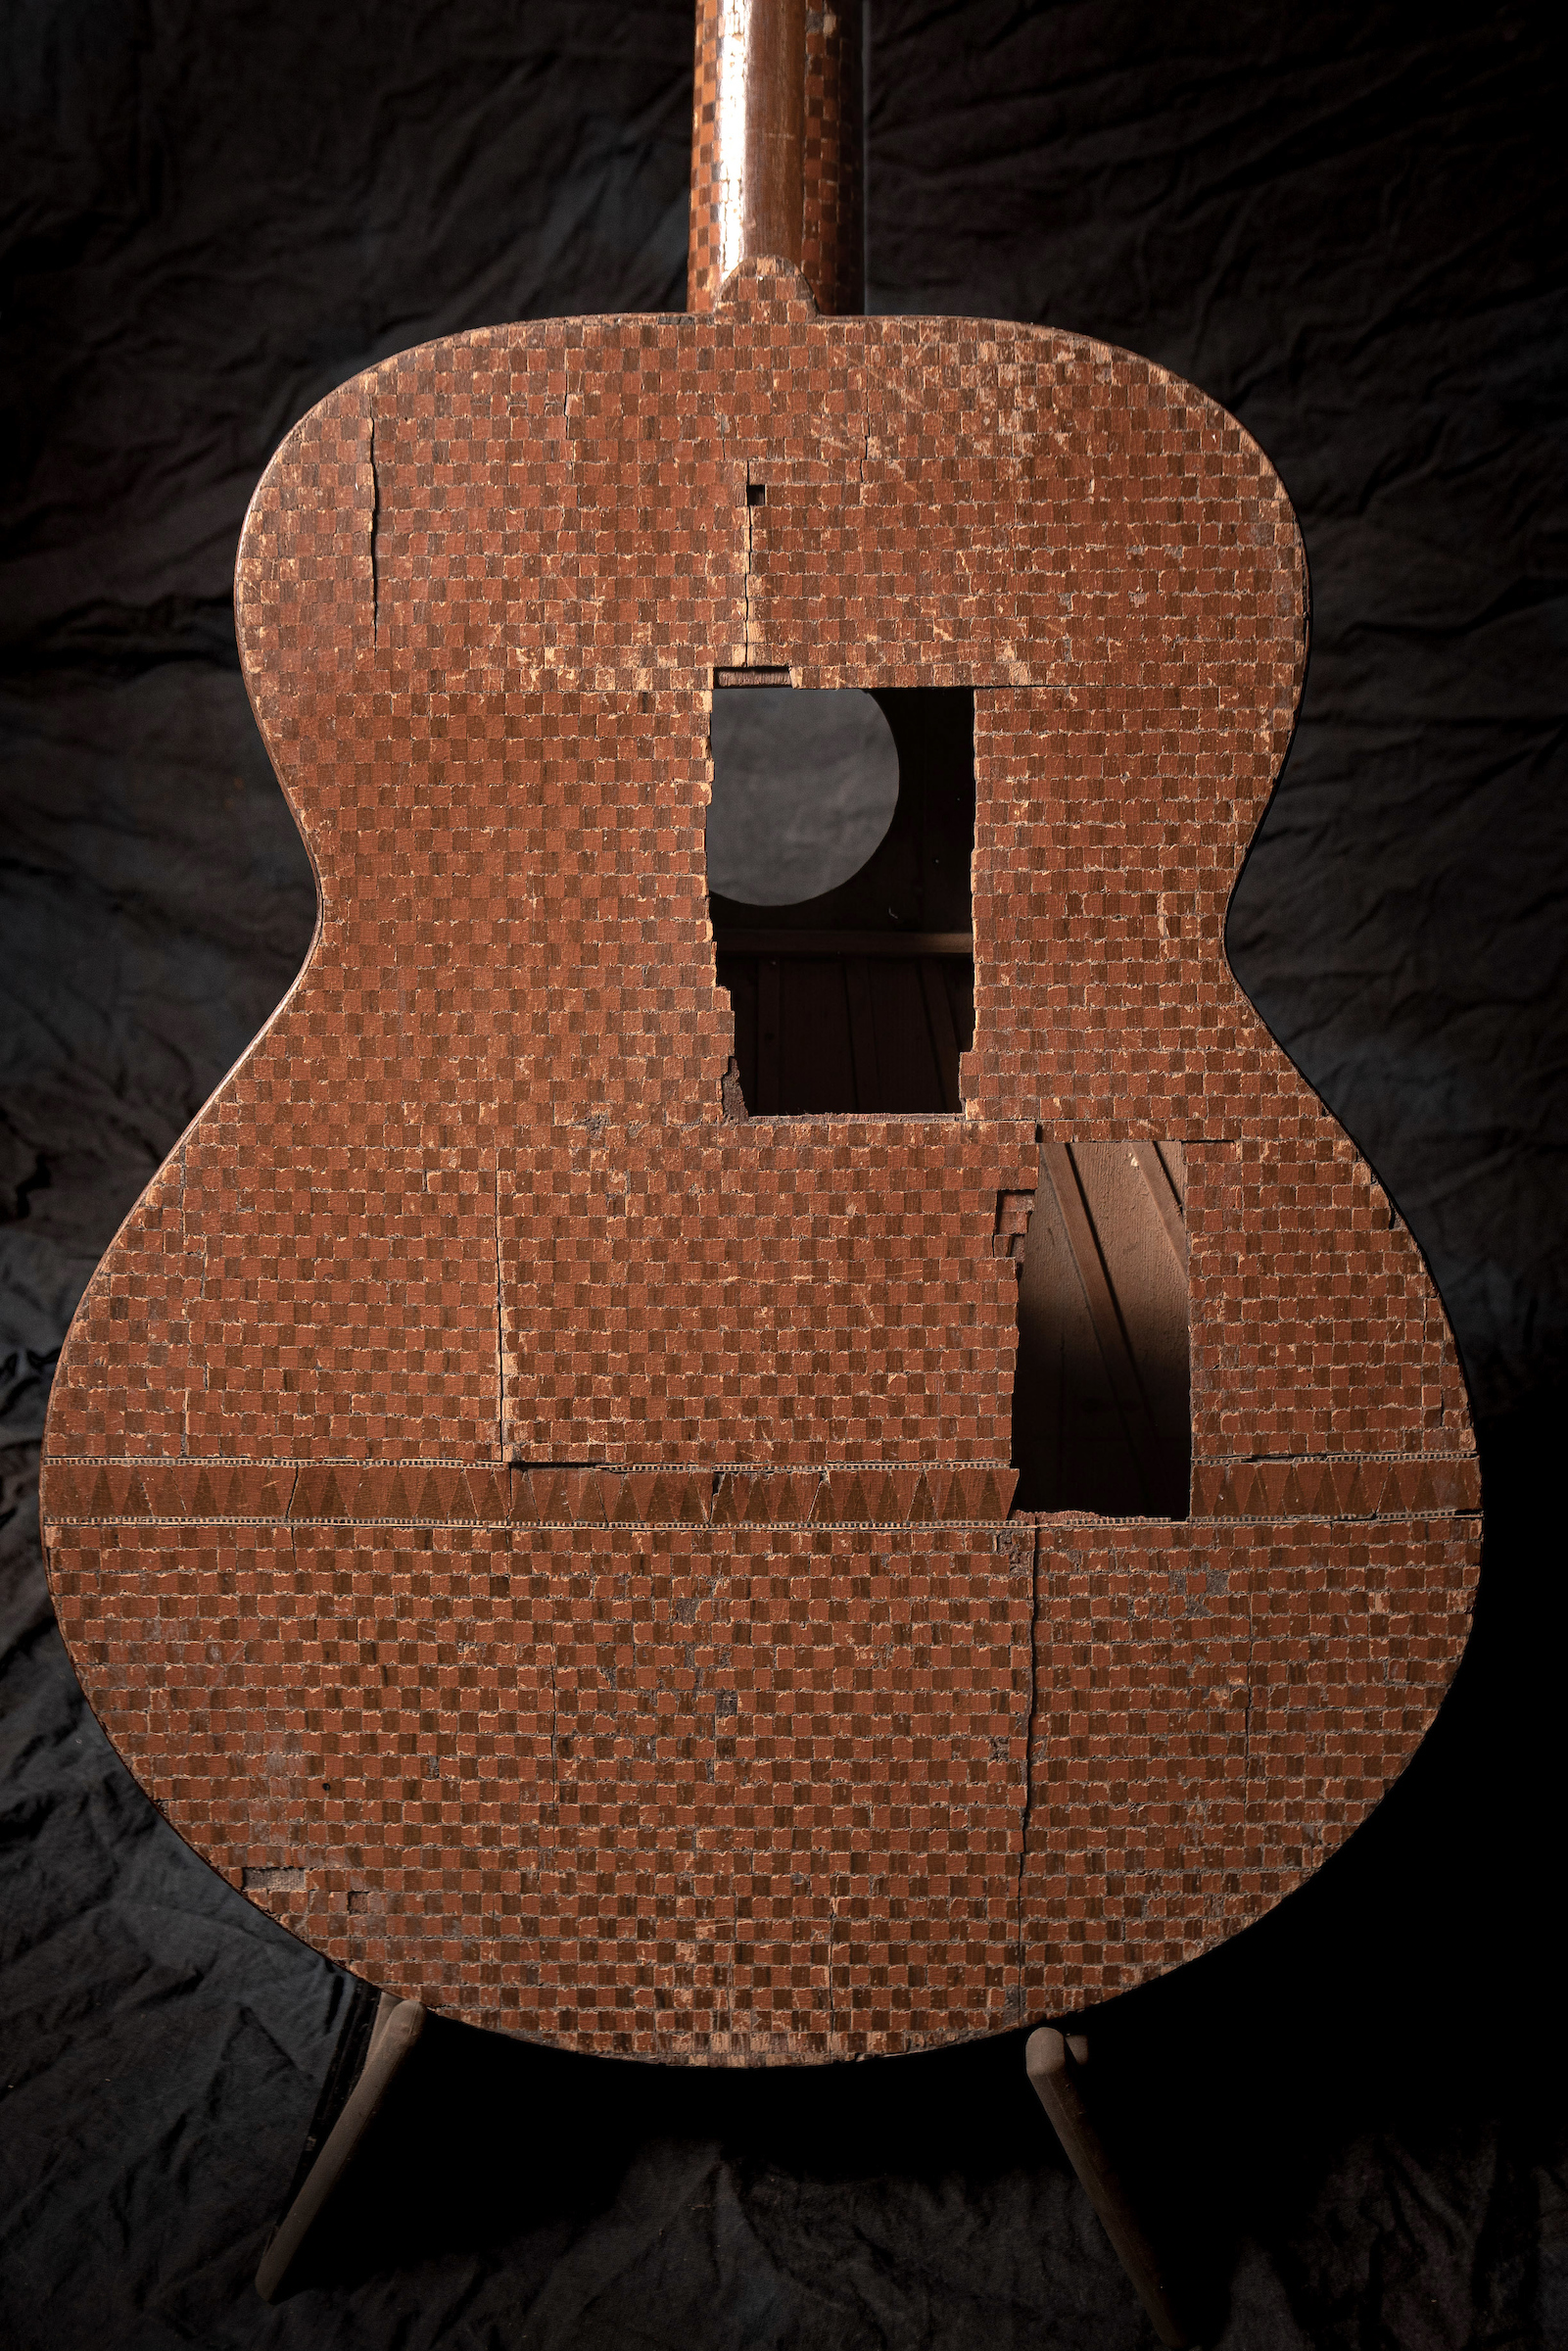
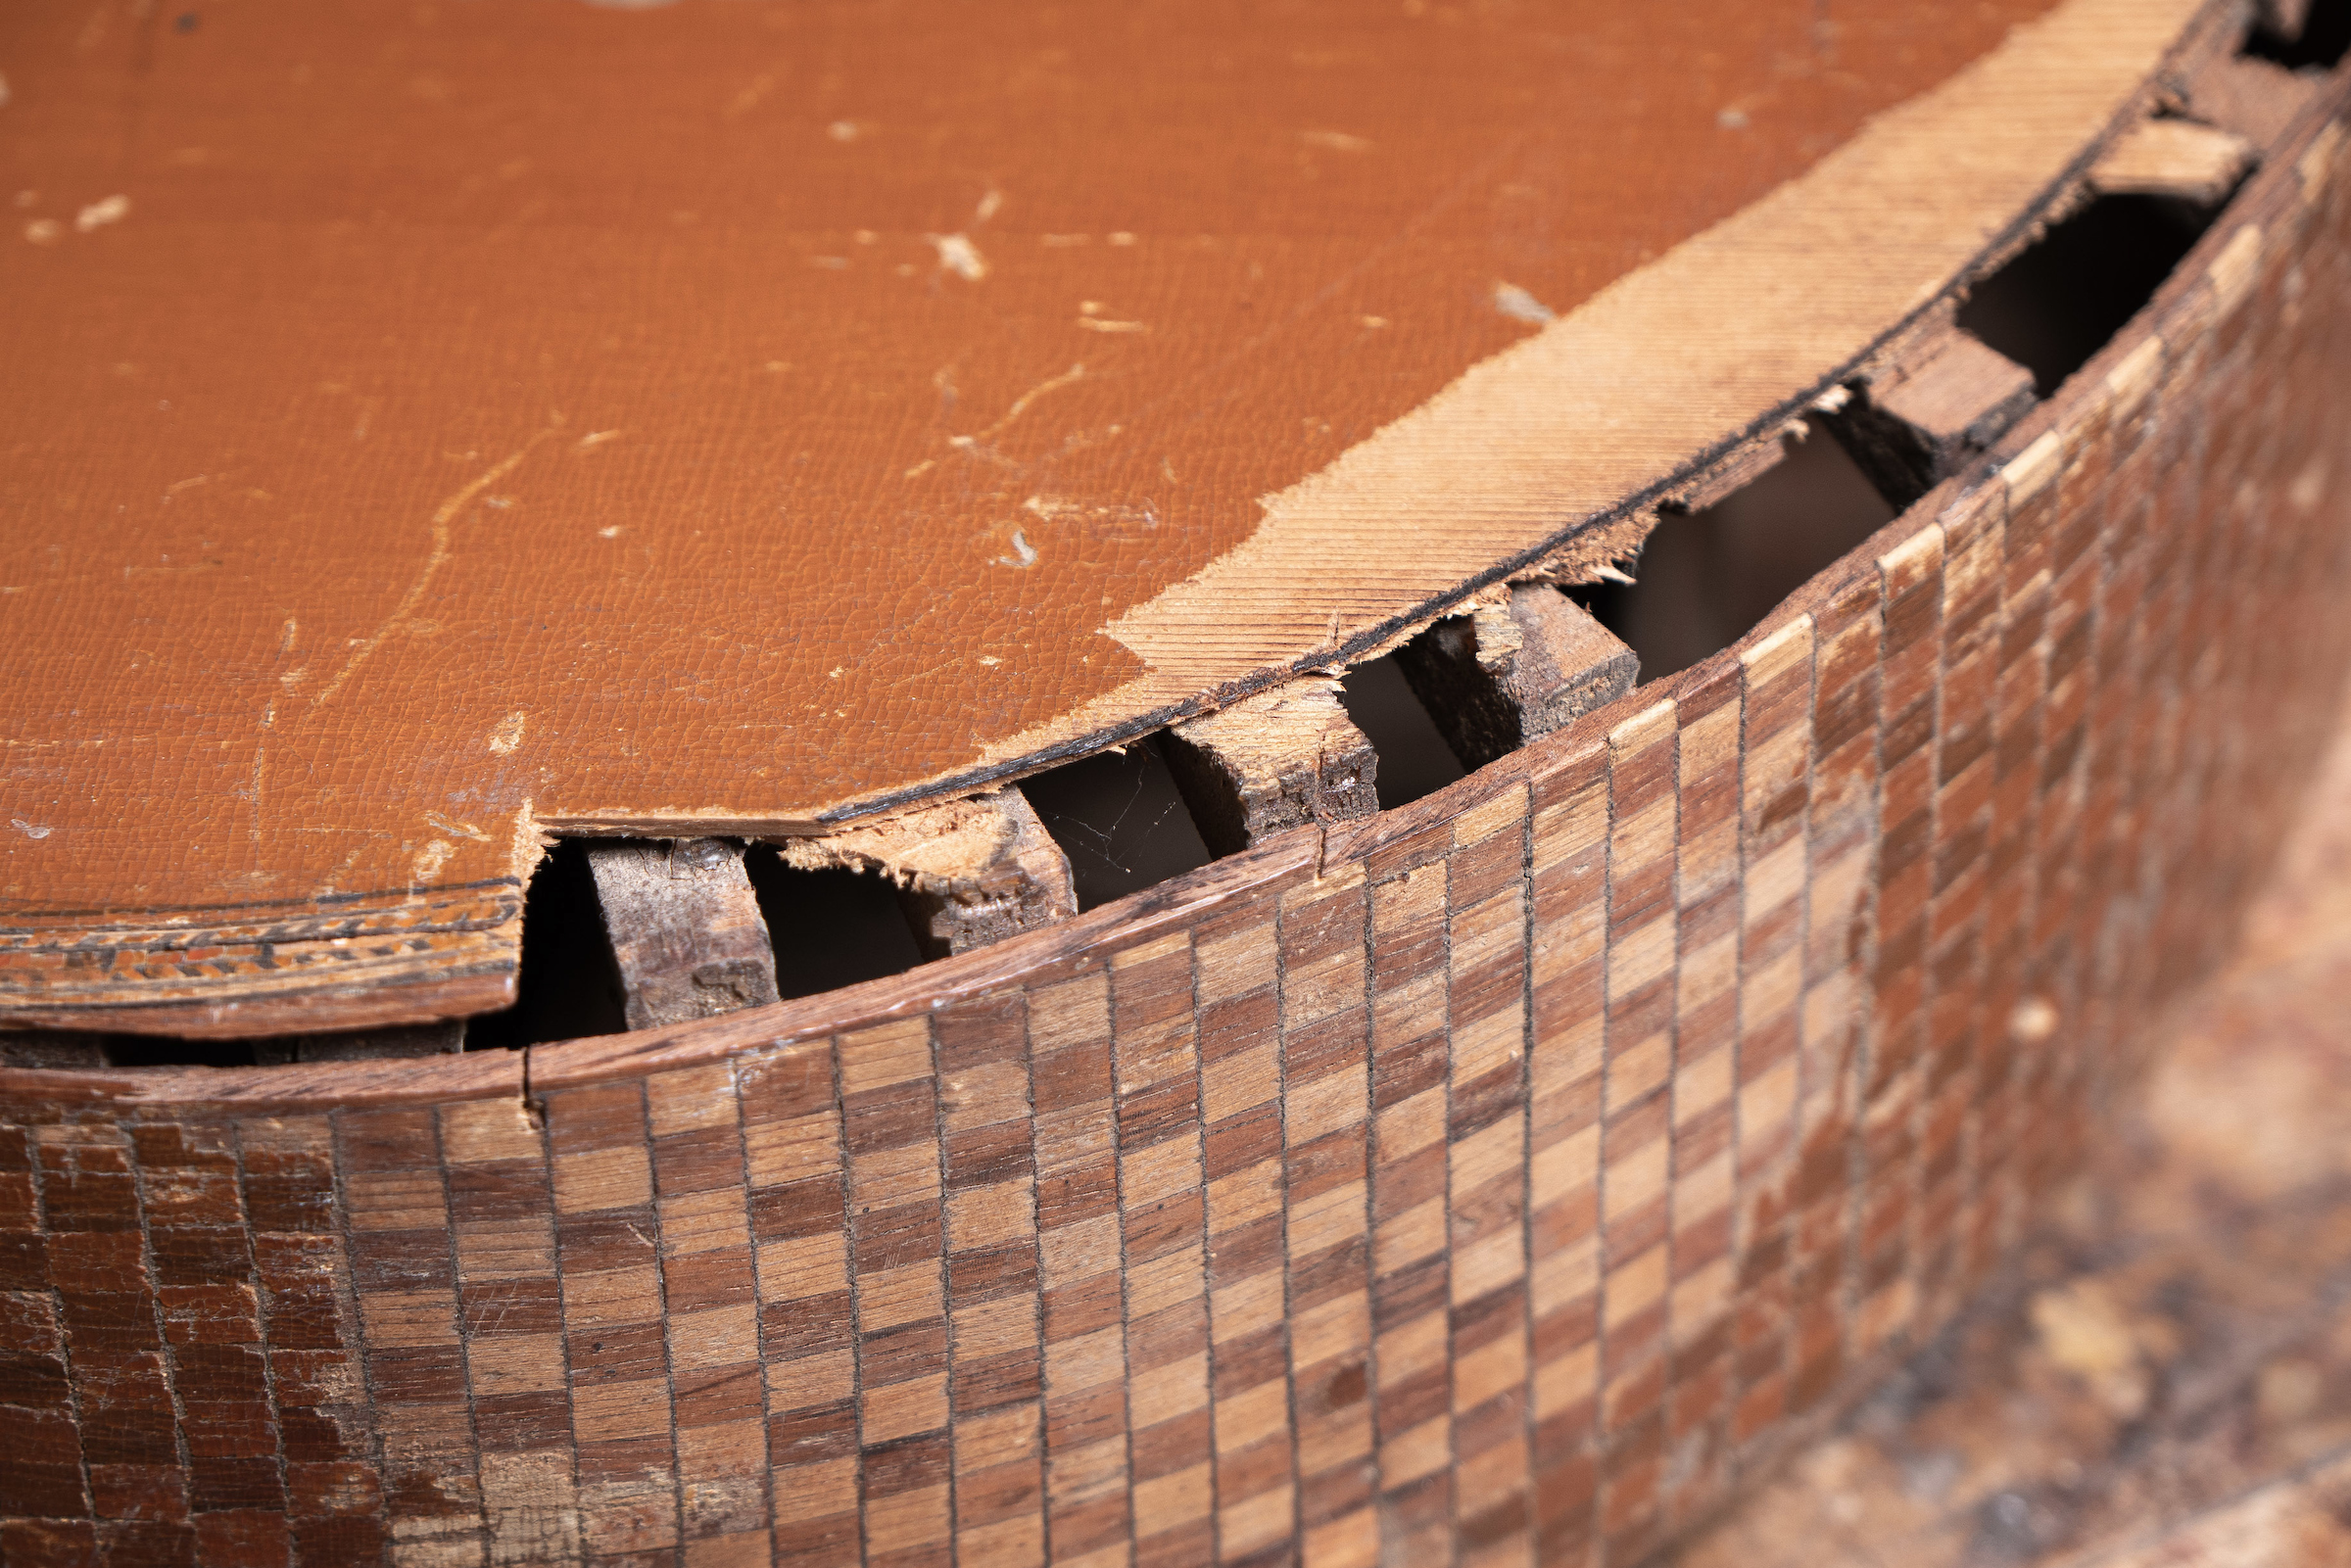
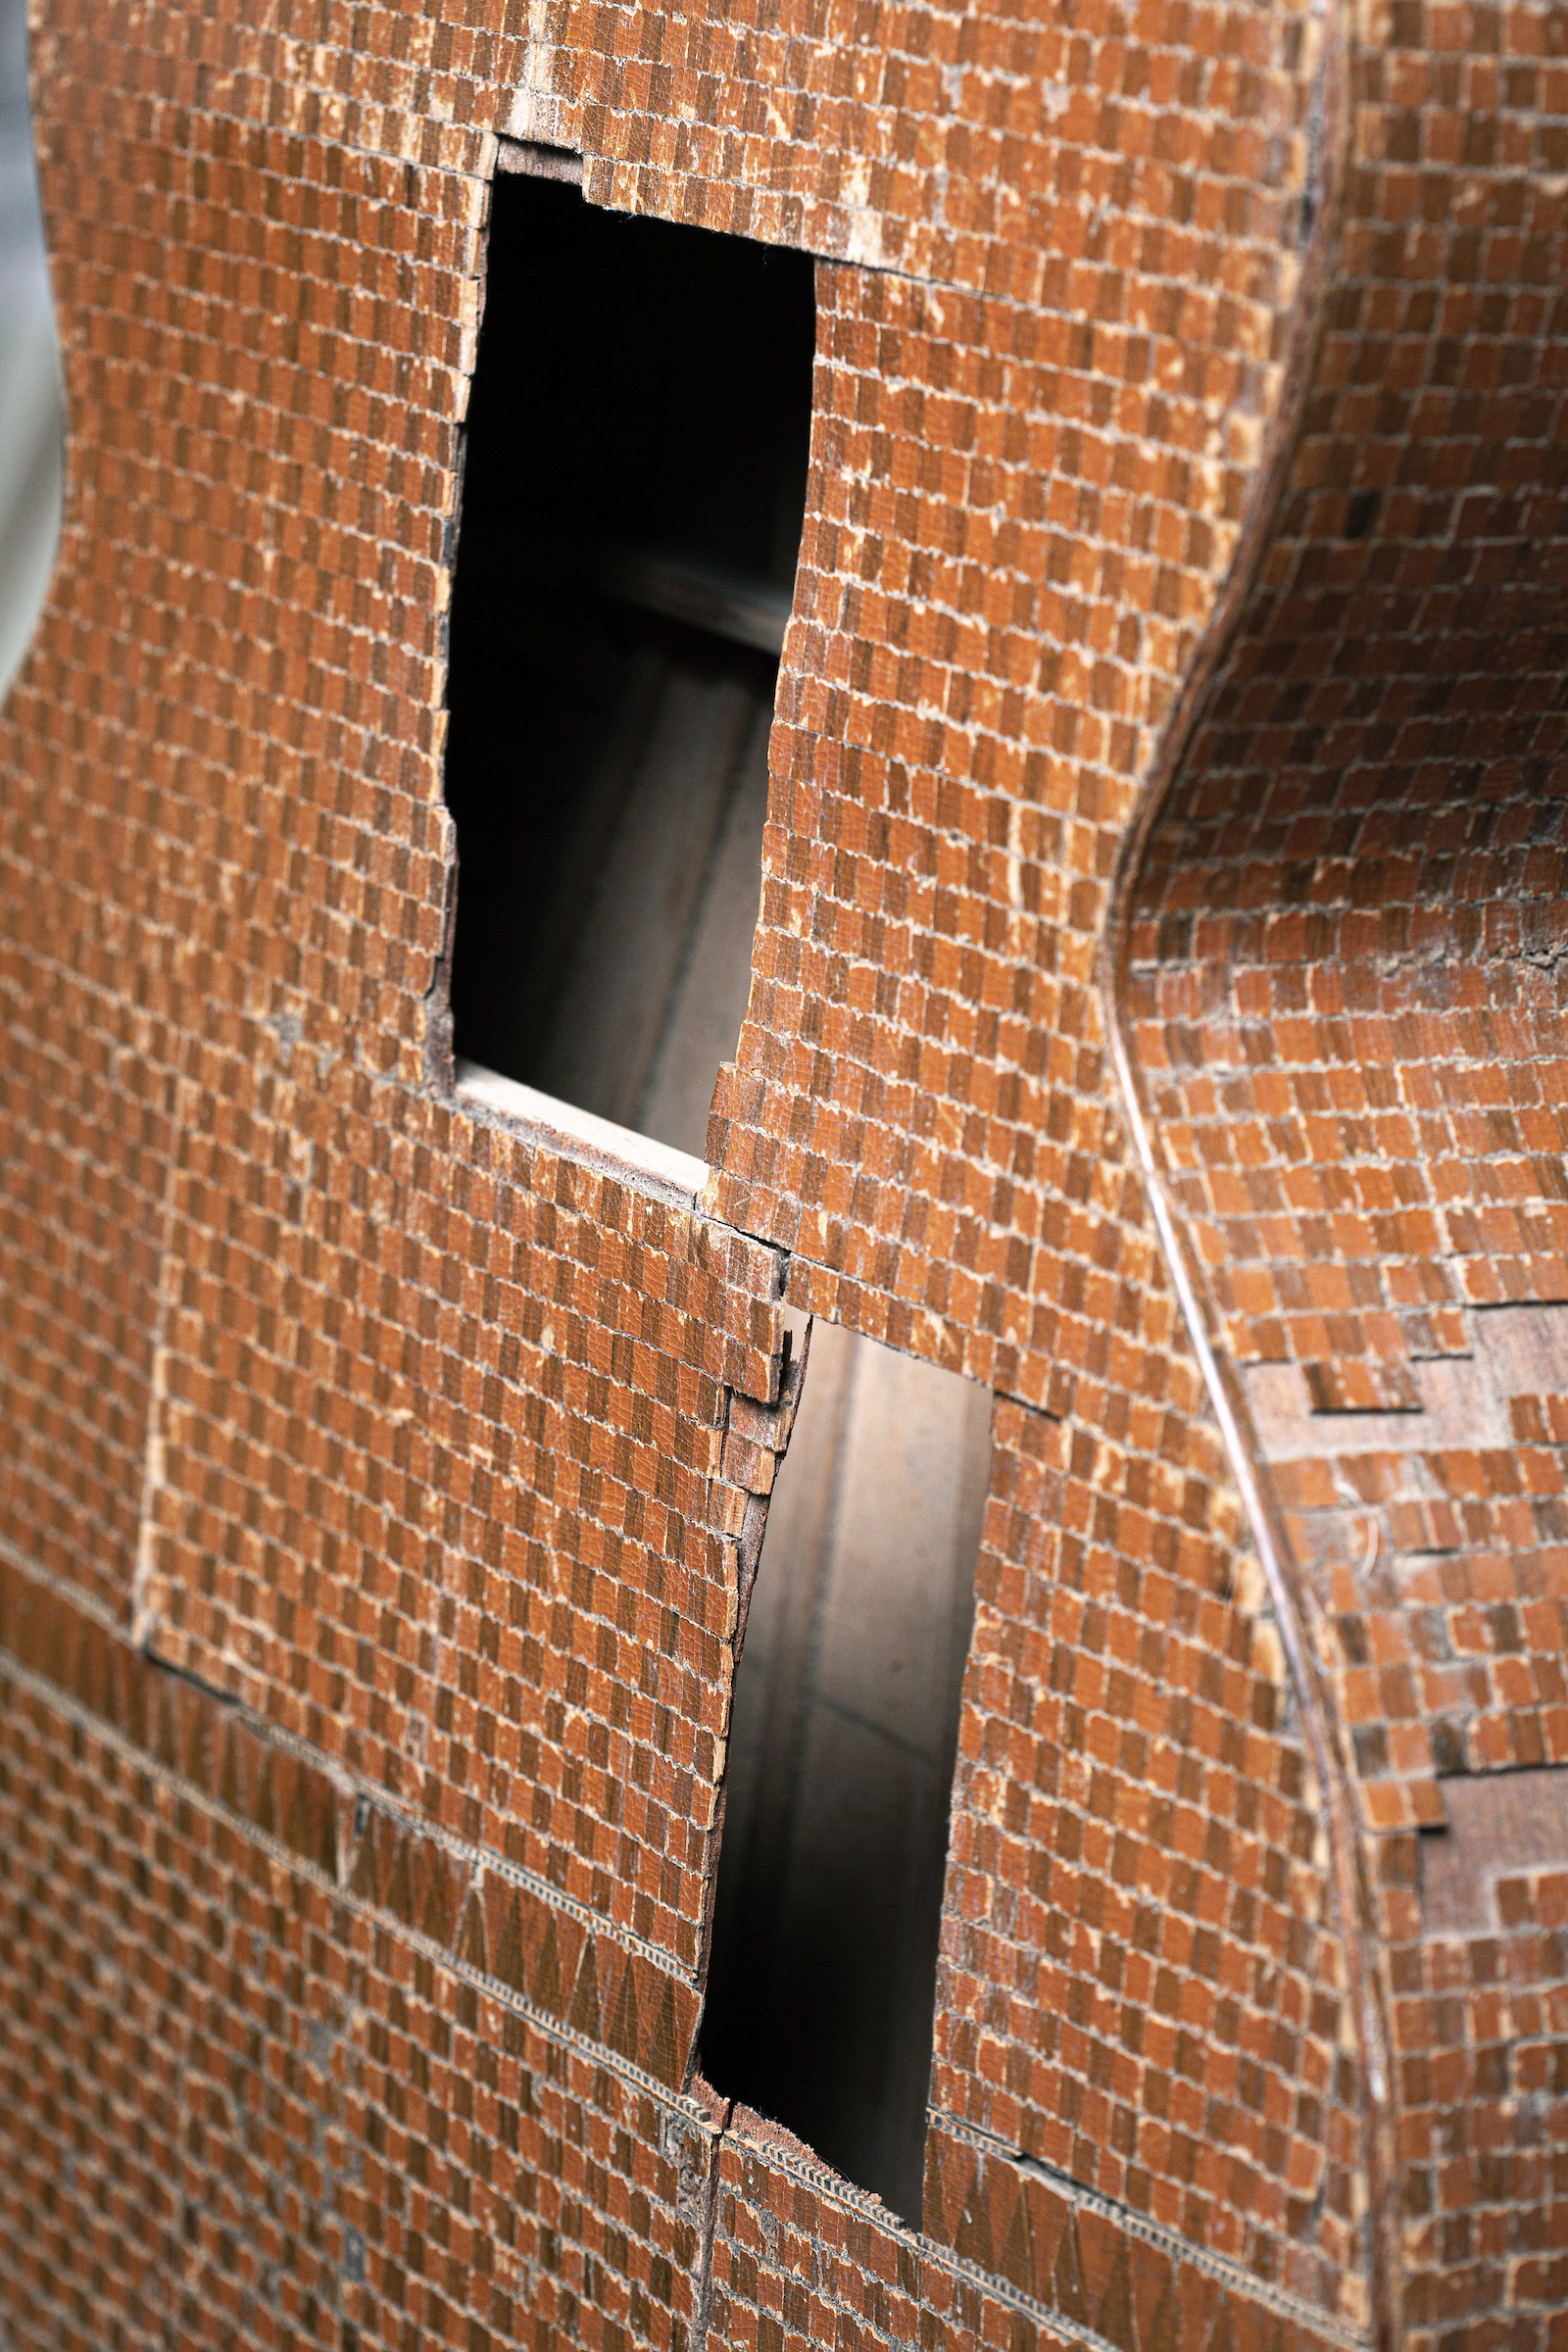
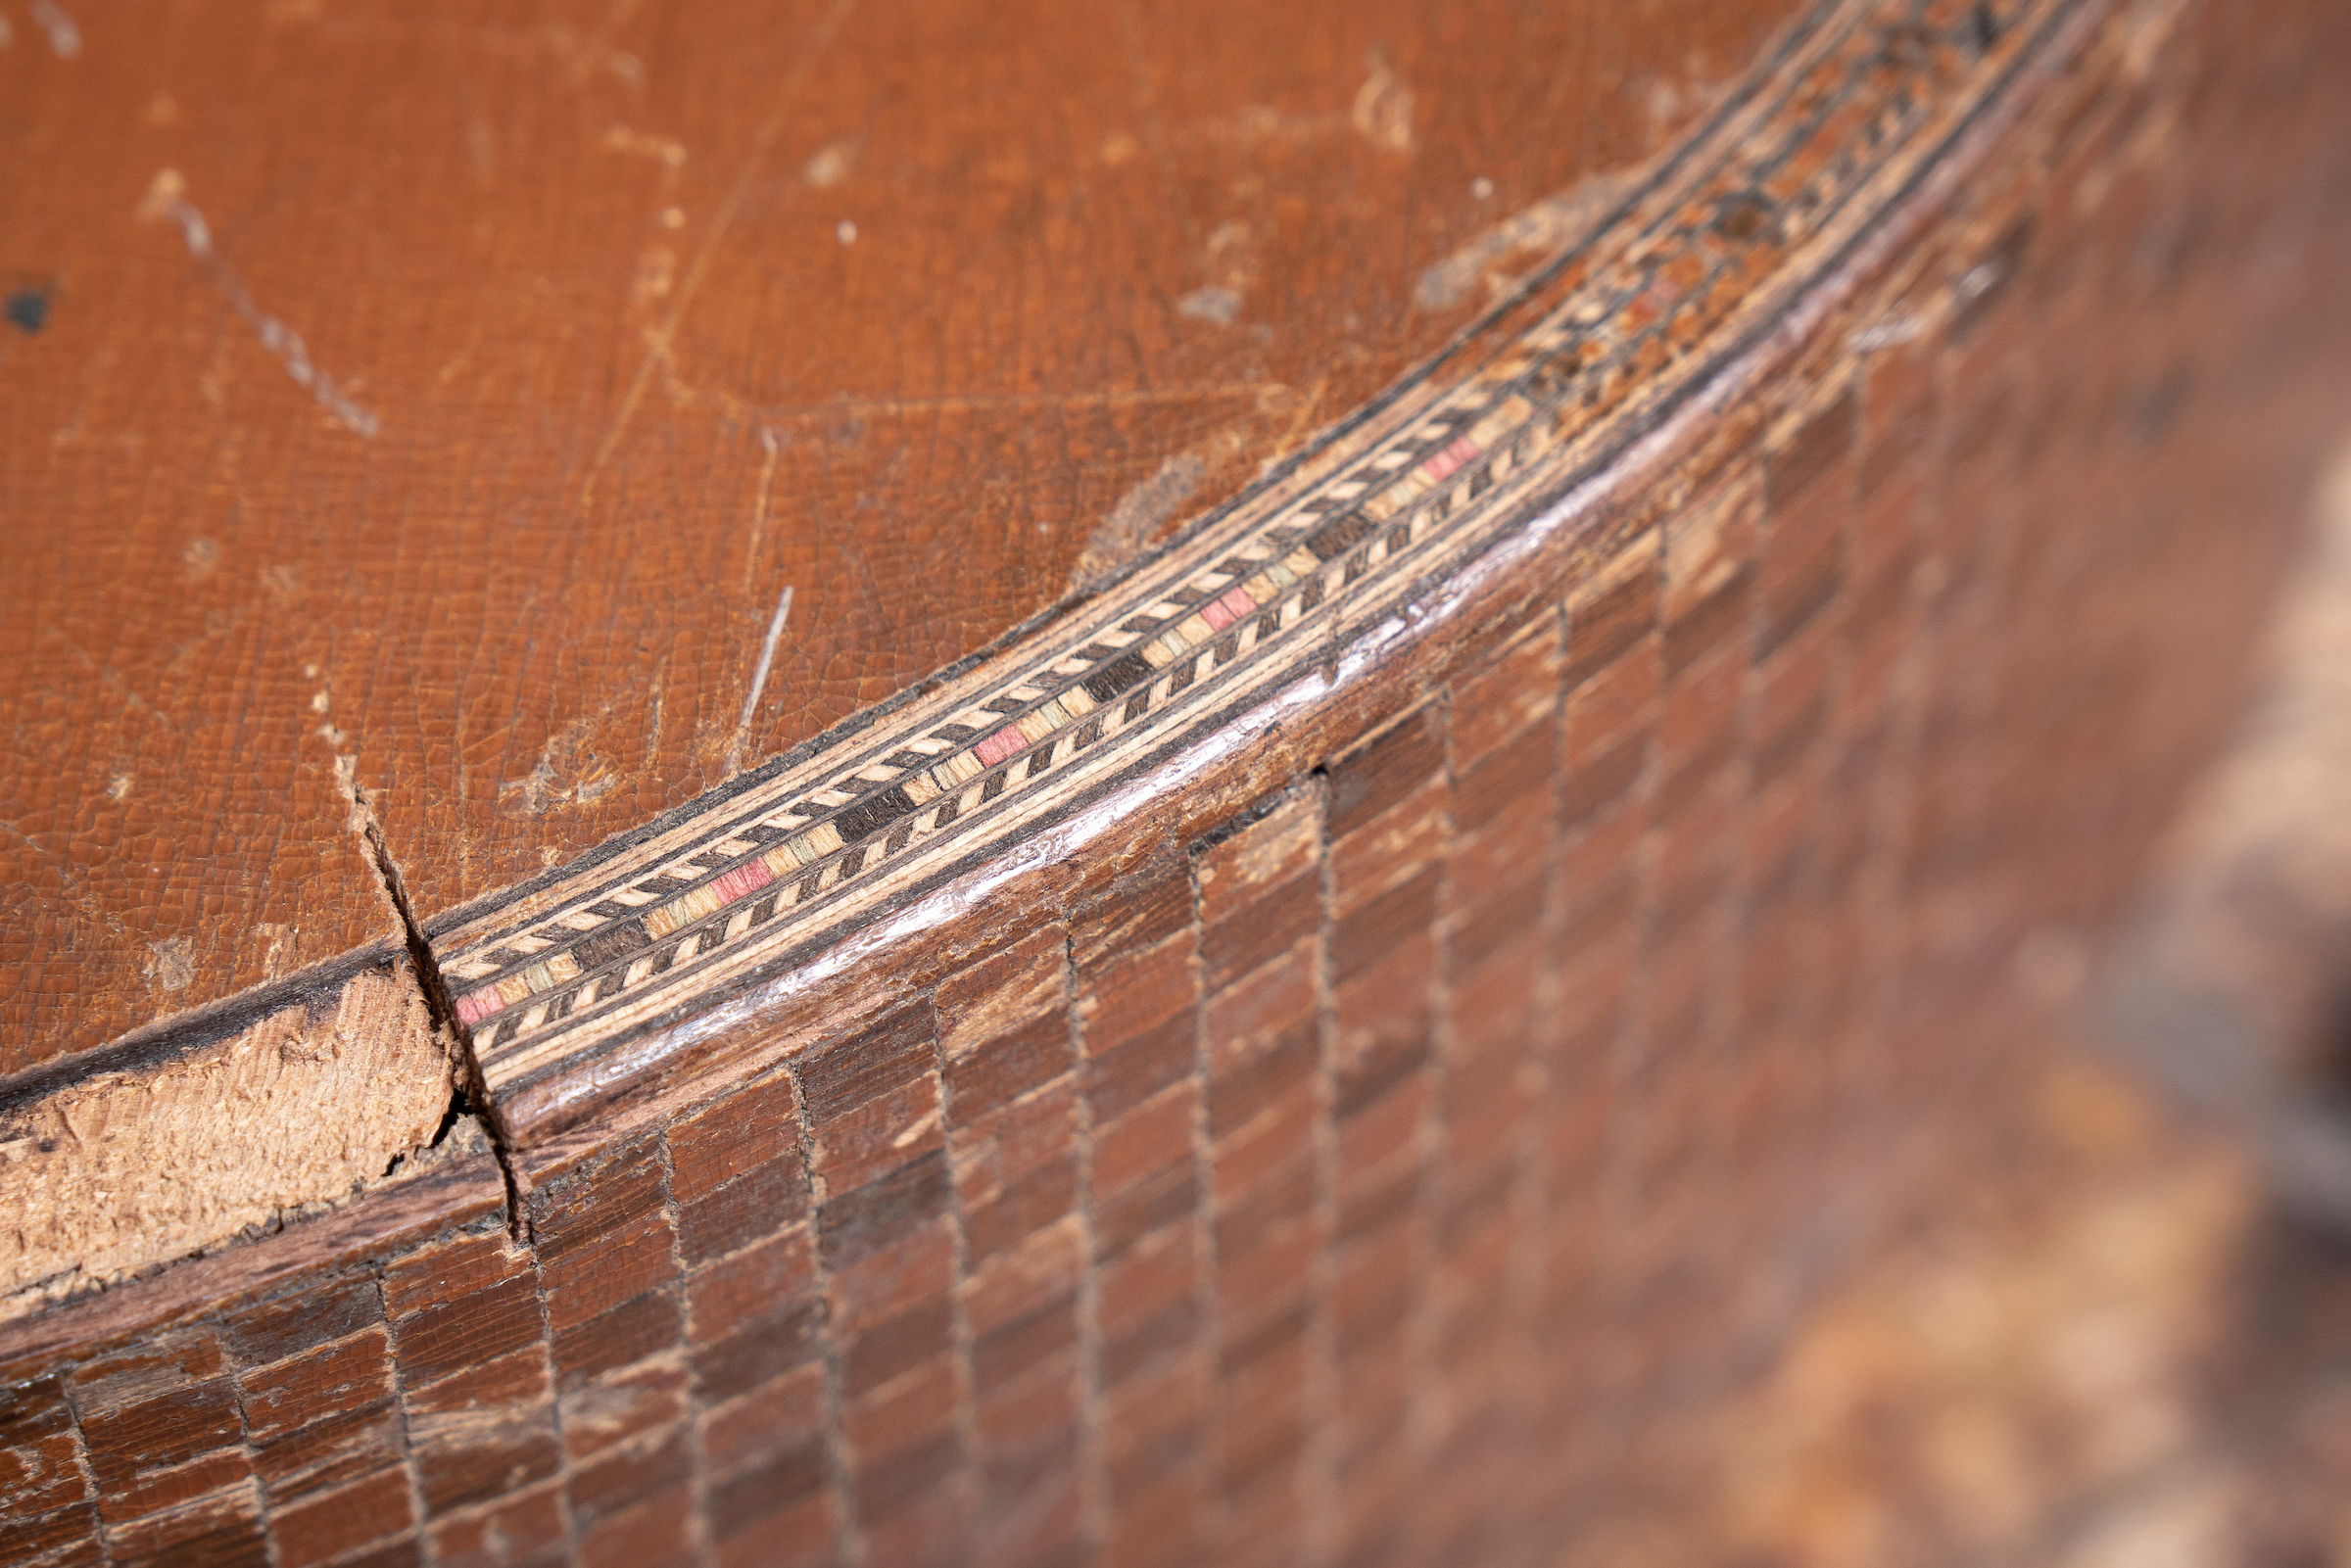
A year or so later I went to San Antonio to visit Mike. To my surprise Mike and his son Michael had found the checkered guitar in the garage that had been his father’s shop. The guitar was in extremely rough shape. There were holes in the back and sides, pieces were missing, portions of the checkered veneer had fallen off, the endblock was cracked, the top was separating from the sides and large portions of the mosaic purfling were missing. The varnish on the guitar had also turned extremely dark and it was obscuring all of its details. Portions of the varnish had been scraped away from the top of the guitar. I looked through all of the obvious problems and could see what a spectacular instrument this had been. I asked Mike if he would allow me to restore it and he agreed. I put the guitar in a plastic bag to catch any pieces that would inevitably fall off, wrapped it in bubble wrap and shipped it to my future self at my shop in Wisconsin.
Once I had the guitar in my shop I hung it up to wait for a time that I’d be able to work on it and to contemplate a strategy for repairing it. When I was making a round of purflings for my guitars, I made up a batch of purflings that matched what was on the guitar.
I also needed to identify the woods that Miguel had used on the guitar. I had thoughts as to what the woods could be, but it’s difficult to definitively identify a wood based on a ¼” sample that is 1/16” thick and covered in dark varnish. If I was going to patch missing pieces, I had to make sure I was using the correct species for my patches. I took samples of the guitar to Forest Products Lab, a division of the U.S. Forest Service, and Alex Wiedenhoeft, who runs the Center for Wood Anatomy, was able to identify the woods in the checkerboard as Brazilian rosewood and Sitka spruce. The woods in the triangle portion of the back were made of mahogany and black walnut.

After much contemplation I reluctantly determined that I would need to replace the back of the guitar. Due to the construction of the instrument, the back was very integral in the structural integrity of the guitar. The substrate of the old back was a very thin layer of mahogany (less than 1/16”) which was riddled with cracks and had pieces missing. The glue holding the checkered veneer was very dry and decaying, and the pieces themselves had become quite fragile with age. The idea of removing the veneer and regluing it to the existing substrate seemed futile, and gluing it to a new one seemed impossible. Once I had made the decision to replace the back, and it was accepted by Mike and Michael, the project was underway.
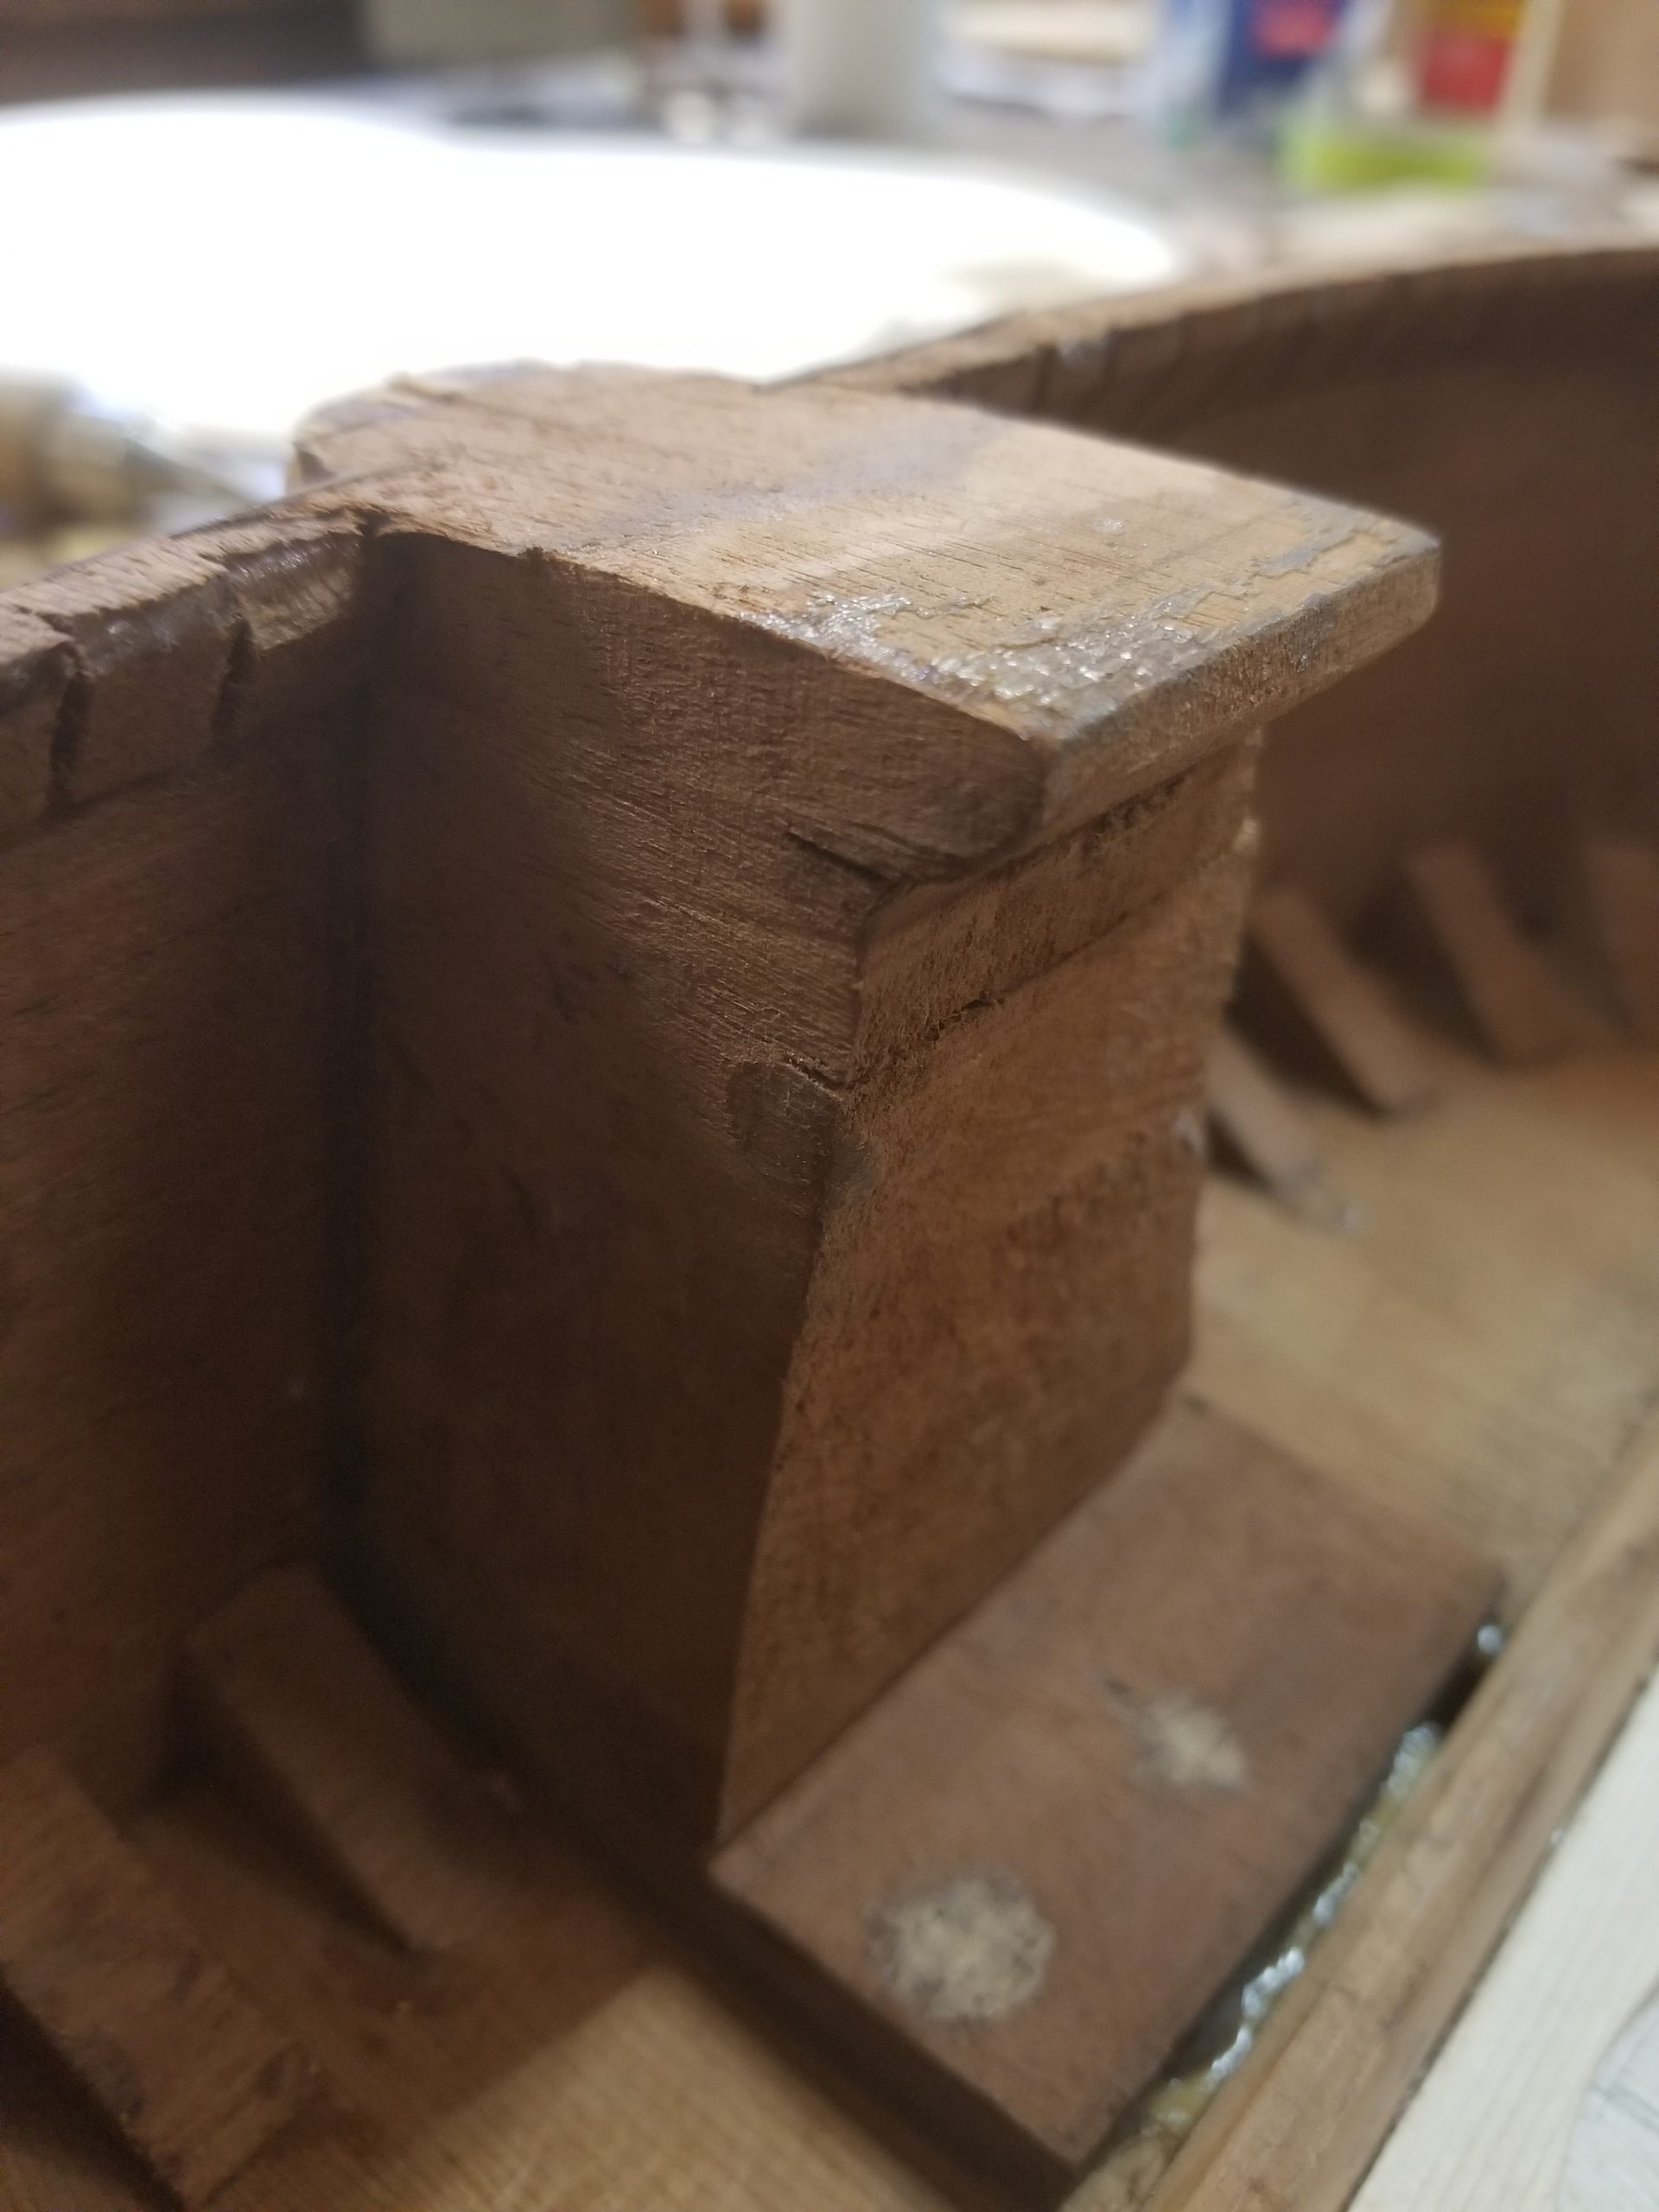
The way this guitar was built was very different than what I am used to. The guitar is built on a board called a solera, and it is essentially built around the top and the neck. I am used to building the body and the neck separately and joining them with a dovetail. Here, there is no separate neck block. What would have been the neck block is part of the neck. The top and neck are glued together on the solera and the sides are fitted into kerfs (little slots) in the neck. This arrangement is called a Spanish heel and it is the way that classical and flamenco guitars are traditionally made, as well as the vast majority of guitar family instruments in Mexico. I had to make a solera for the guitar and remove the fingerboard in order to allow the guitar to sit flat on the solera. At this moment I discovered my first surprise.
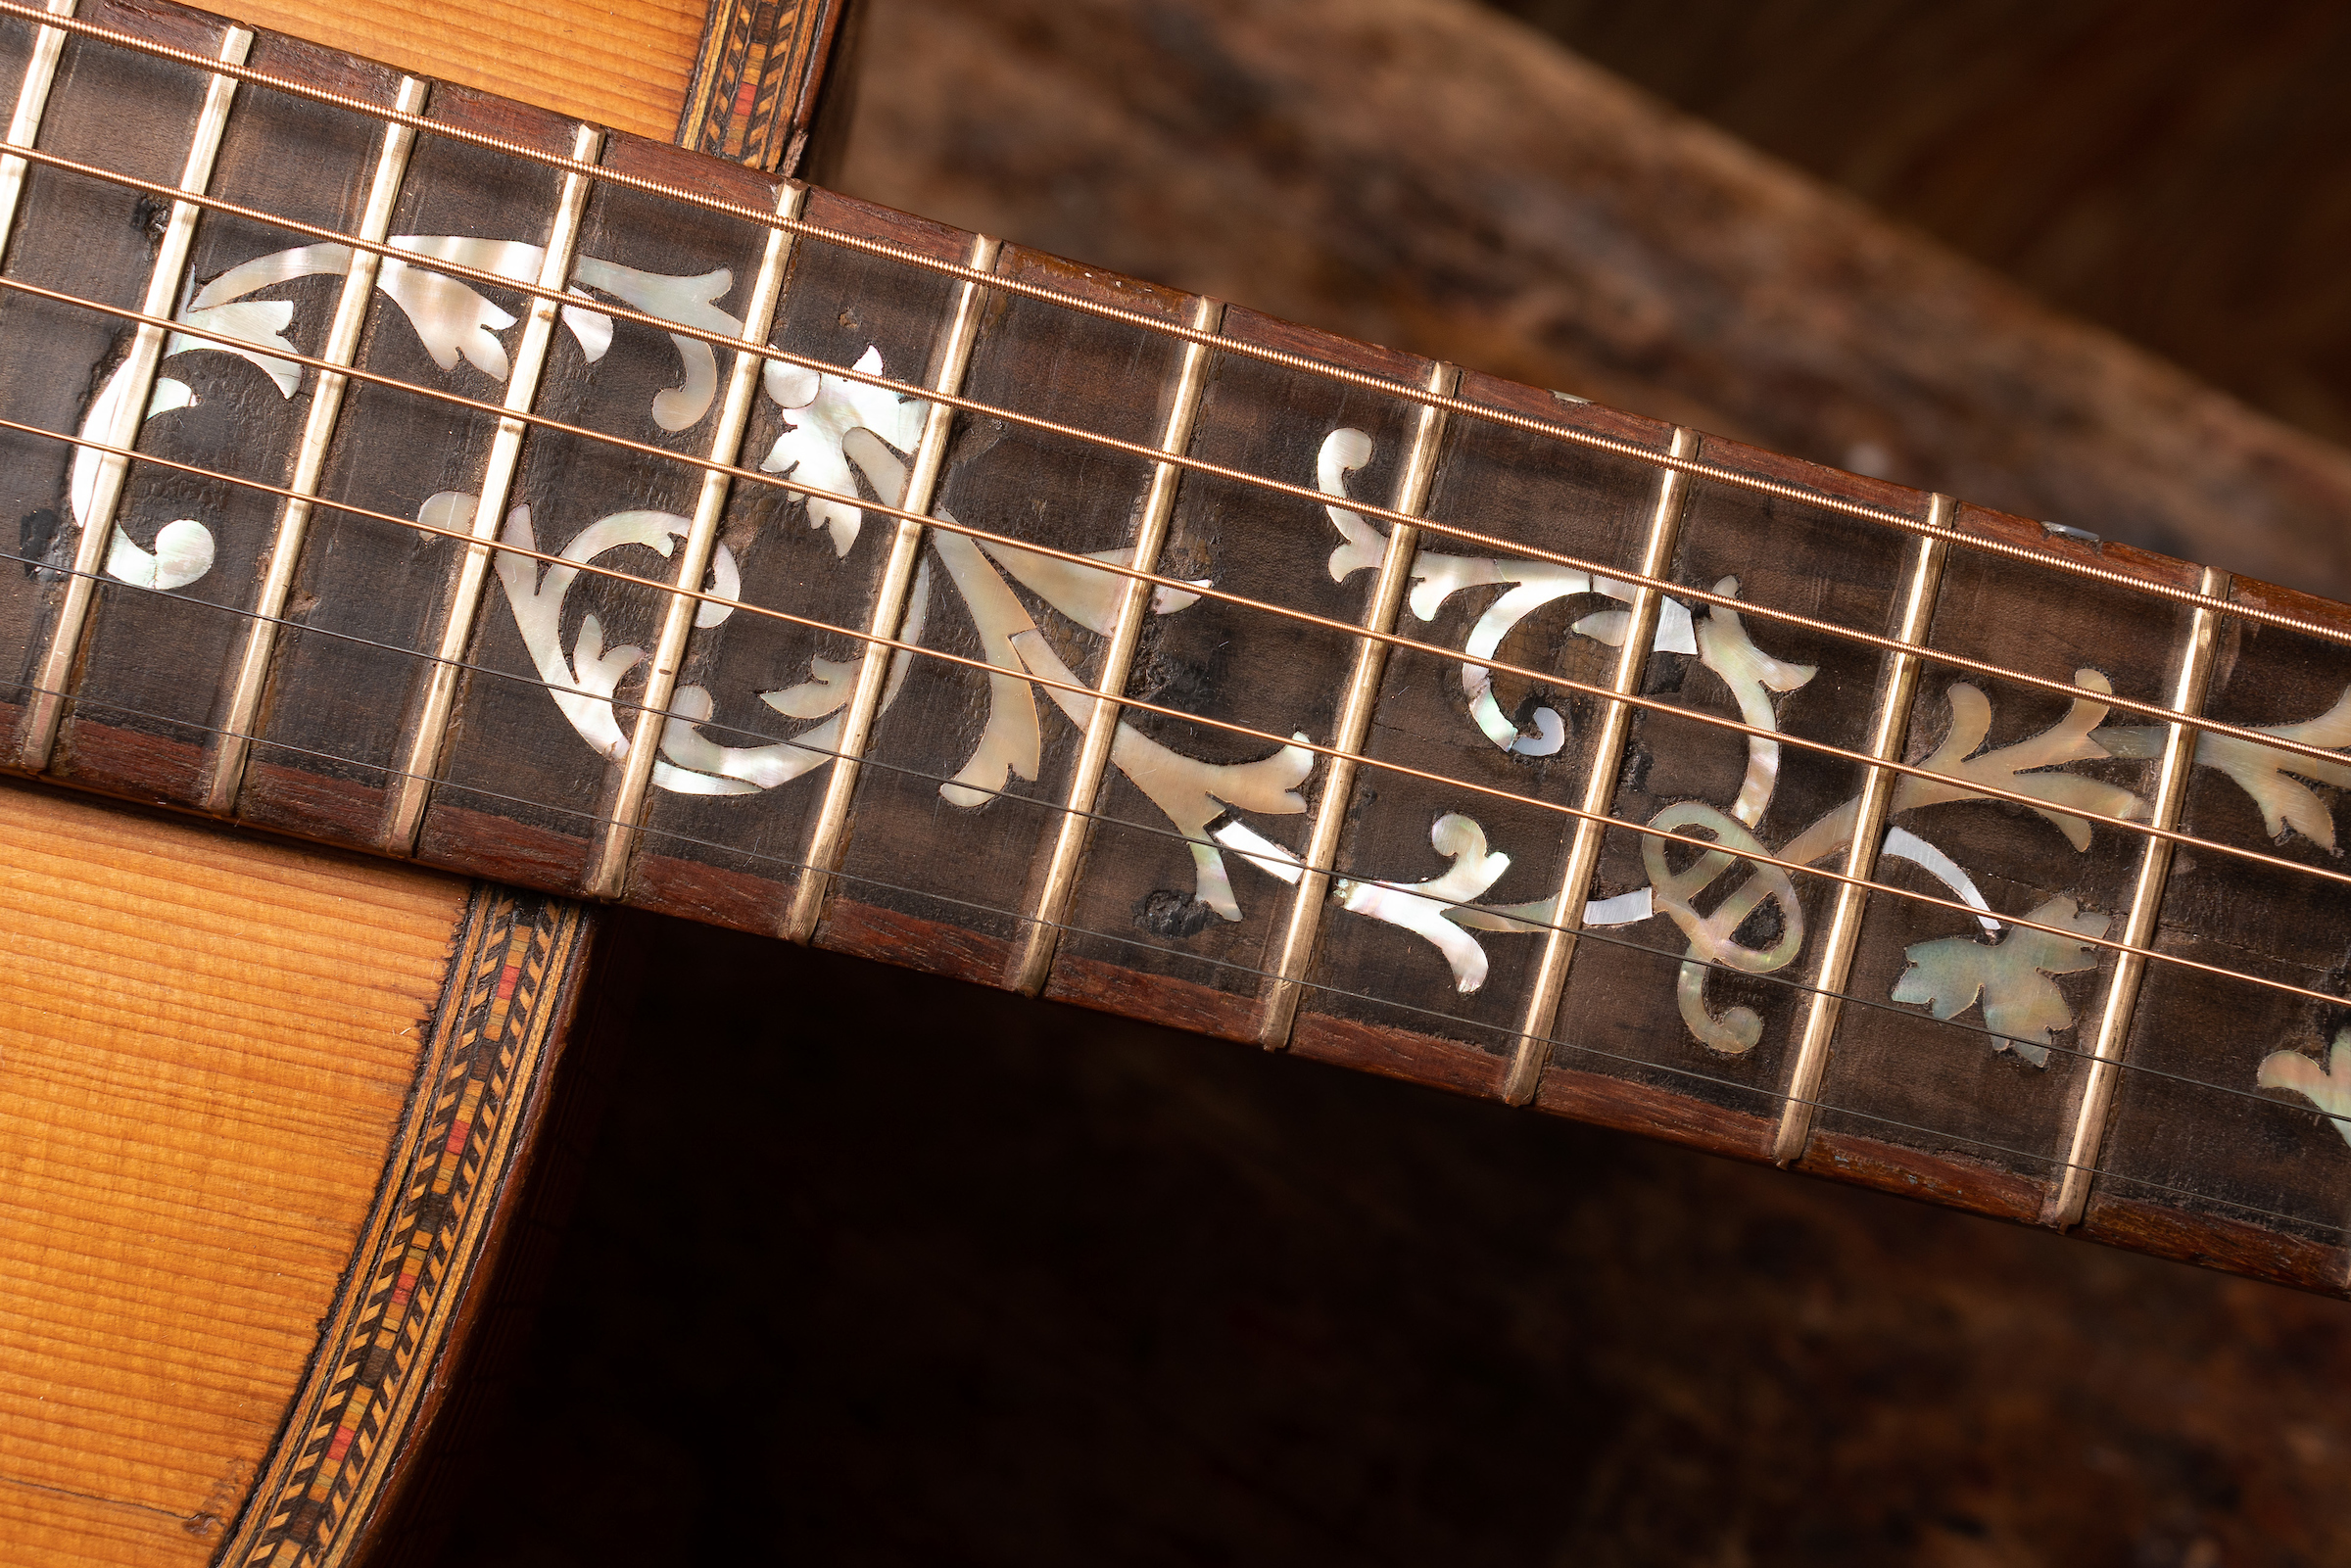
The fingerboard, which featured a Tree of Life inlay in mother of pearl, had been salvaged from an old Oscar Schmidt guitar. I had recognized this when I first saw the guitar. Miguel had planed the fingerboard down until it was ⅛” thick and then glued it to a piece of Brazilian rosewood so that it would be more stable and substantial. He then bound the fingerboard with Brazilian rosewood to obscure the joint. He had also fitted the mahogany neck with a piece of Brazilian rosewood that was 1” wide and went through the entire depth of the neck, from the 1st fret to the 12th, to act as a reinforcement. I think he did this at a later date in order to correct a bow that was occurring in the slender neck. He cut the slot using a brace and bit (old time hand crank drill) and a chisel. I was able to tell this from clues left behind on the fingerboard.
Once the fingerboard was off and the guitar was fitted to the solera and secure, I removed the back. This gave me access to the inside of the guitar where I was able to address loose braces, and linings, and to repair cracks and holes in the sides. I was also able to reglue the sides back to the top of the guitar and to replace the cracked end block.
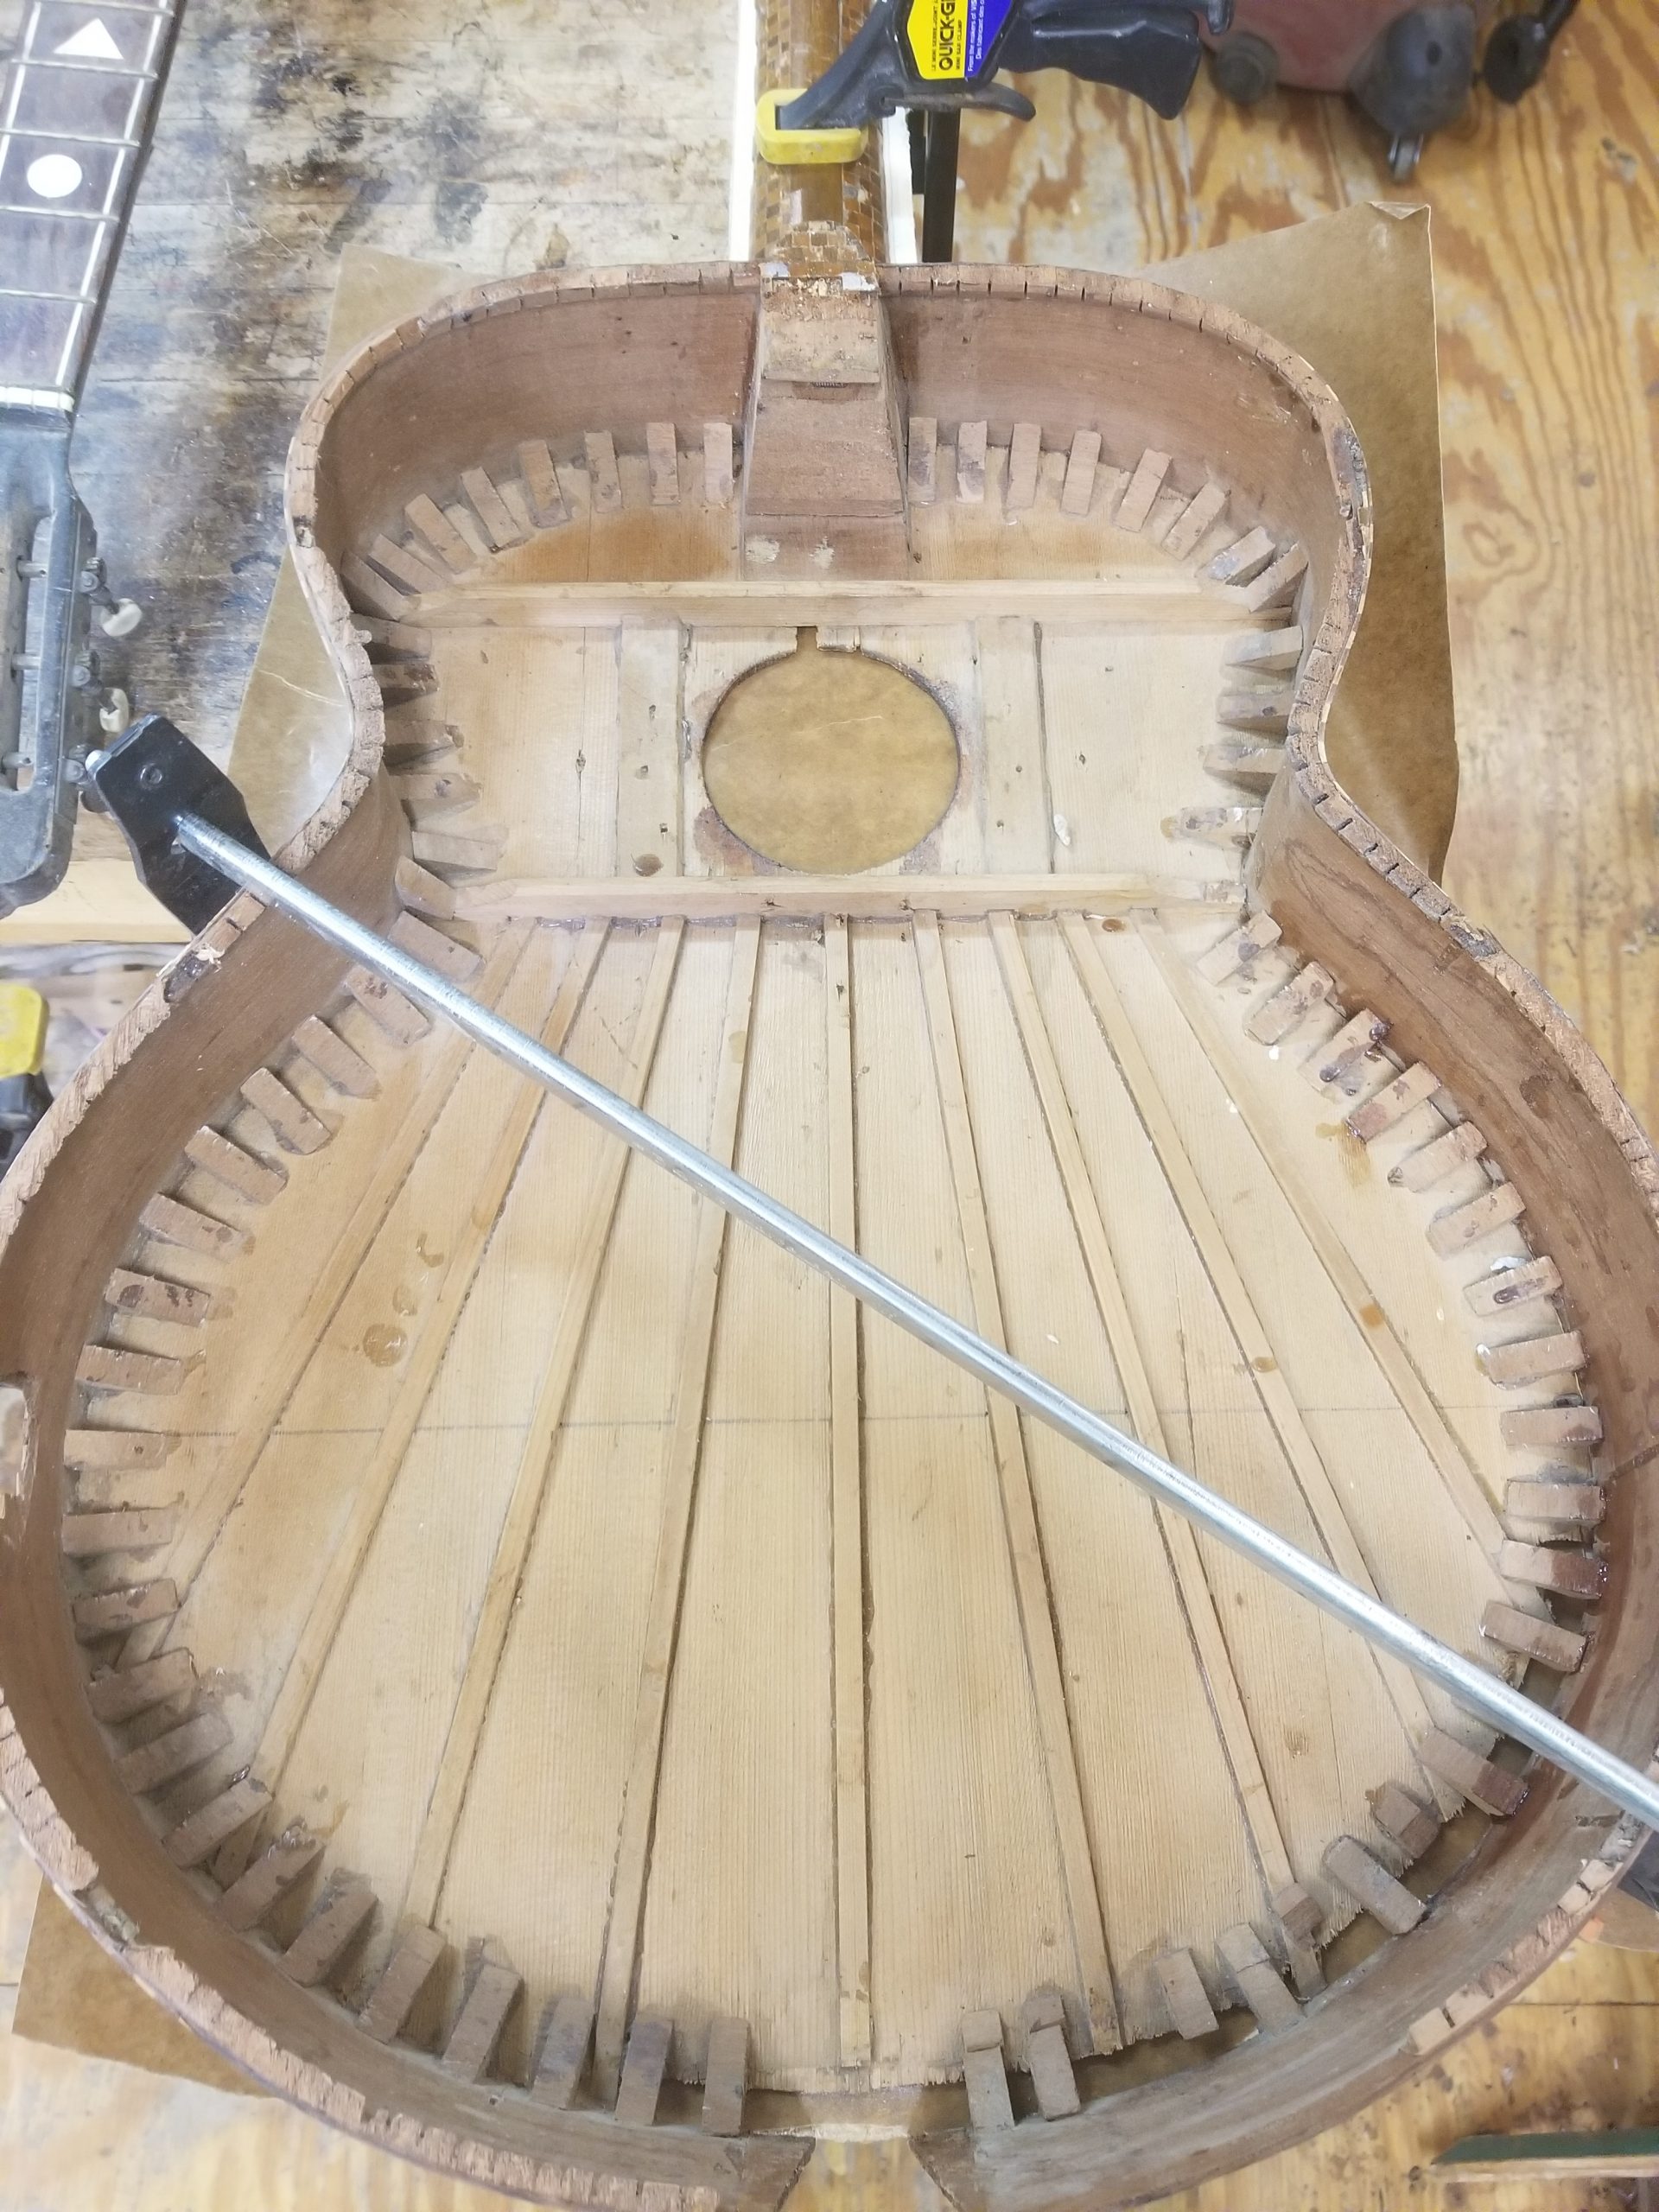
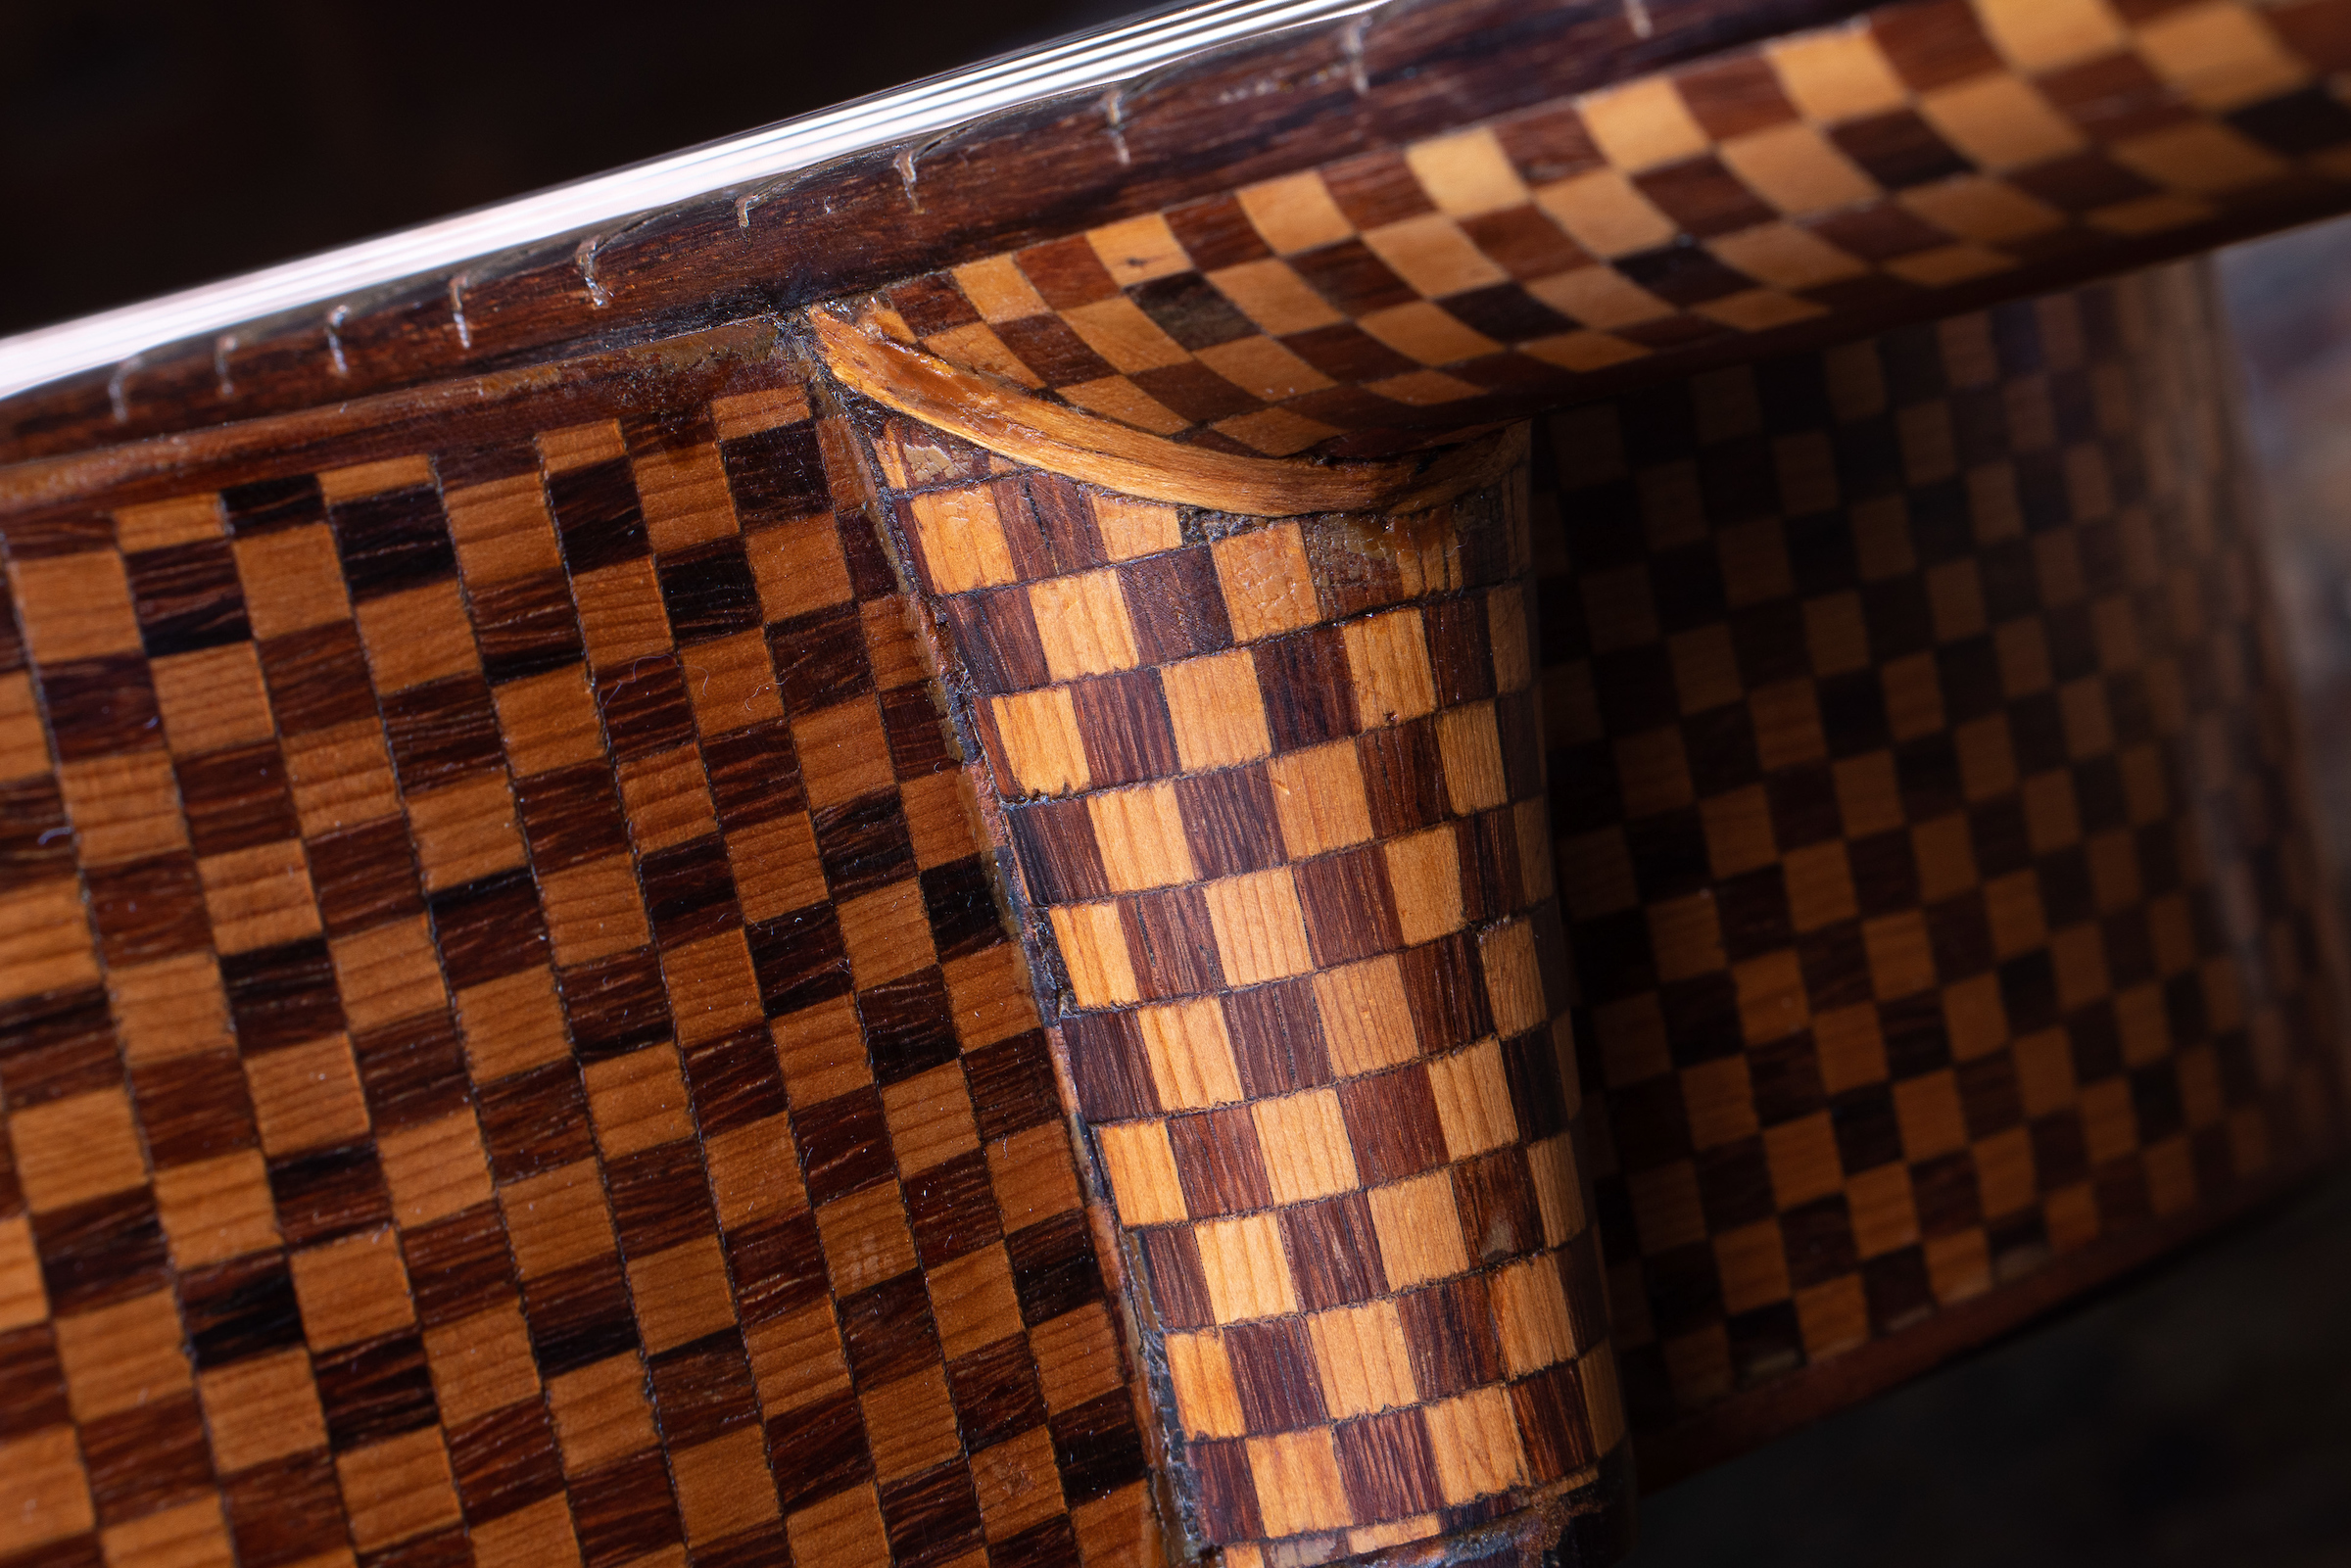
The top of the guitar was made with 4 pieces of Sitka spruce joined together to cover the 17 ¼” span. It was somewhat lightly fan braced, which was interesting to me as it was a steel string guitar. Fan bracing is usually used on classical guitars. The Acostas seem to have ladder braced their earlier guitars and fan braced some of their later ones. In a photo of Miguel in the shop in 1937, the 12 string guitar that he is building is fan braced. I had assumed that Miguel had used a Gibson J-200 as inspiration, but I wondered if he had ever had the opportunity to look inside one?
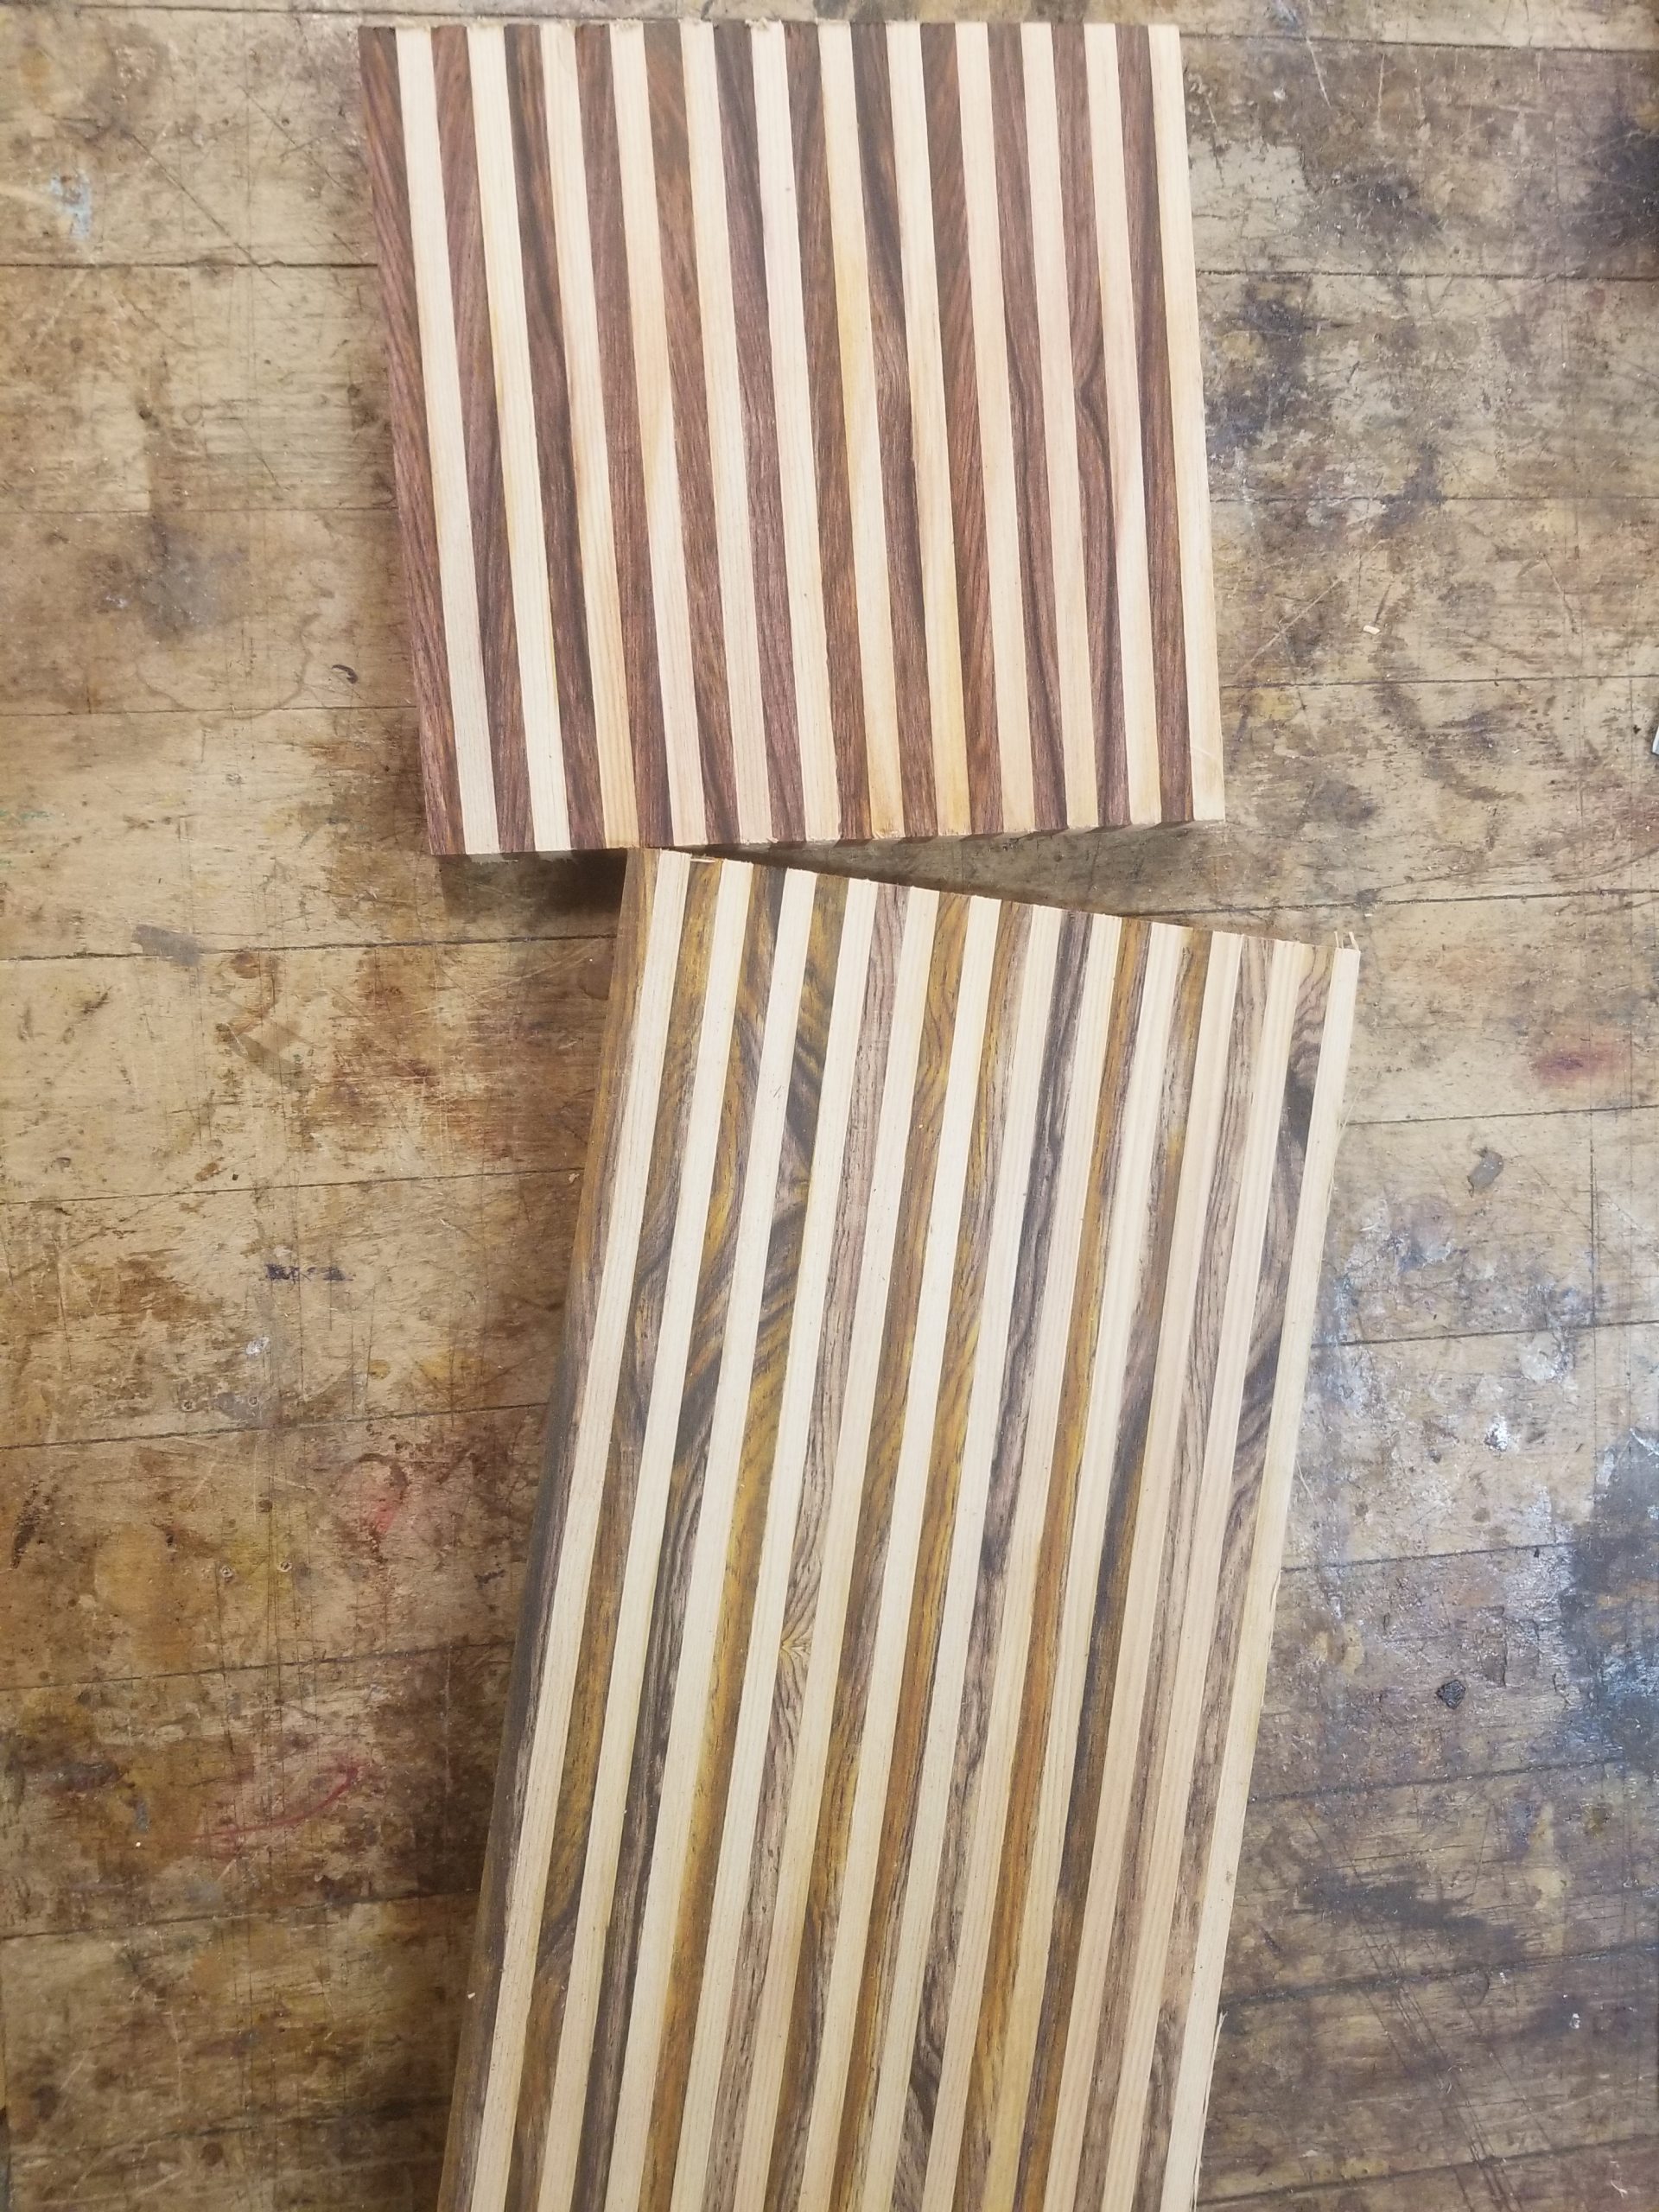
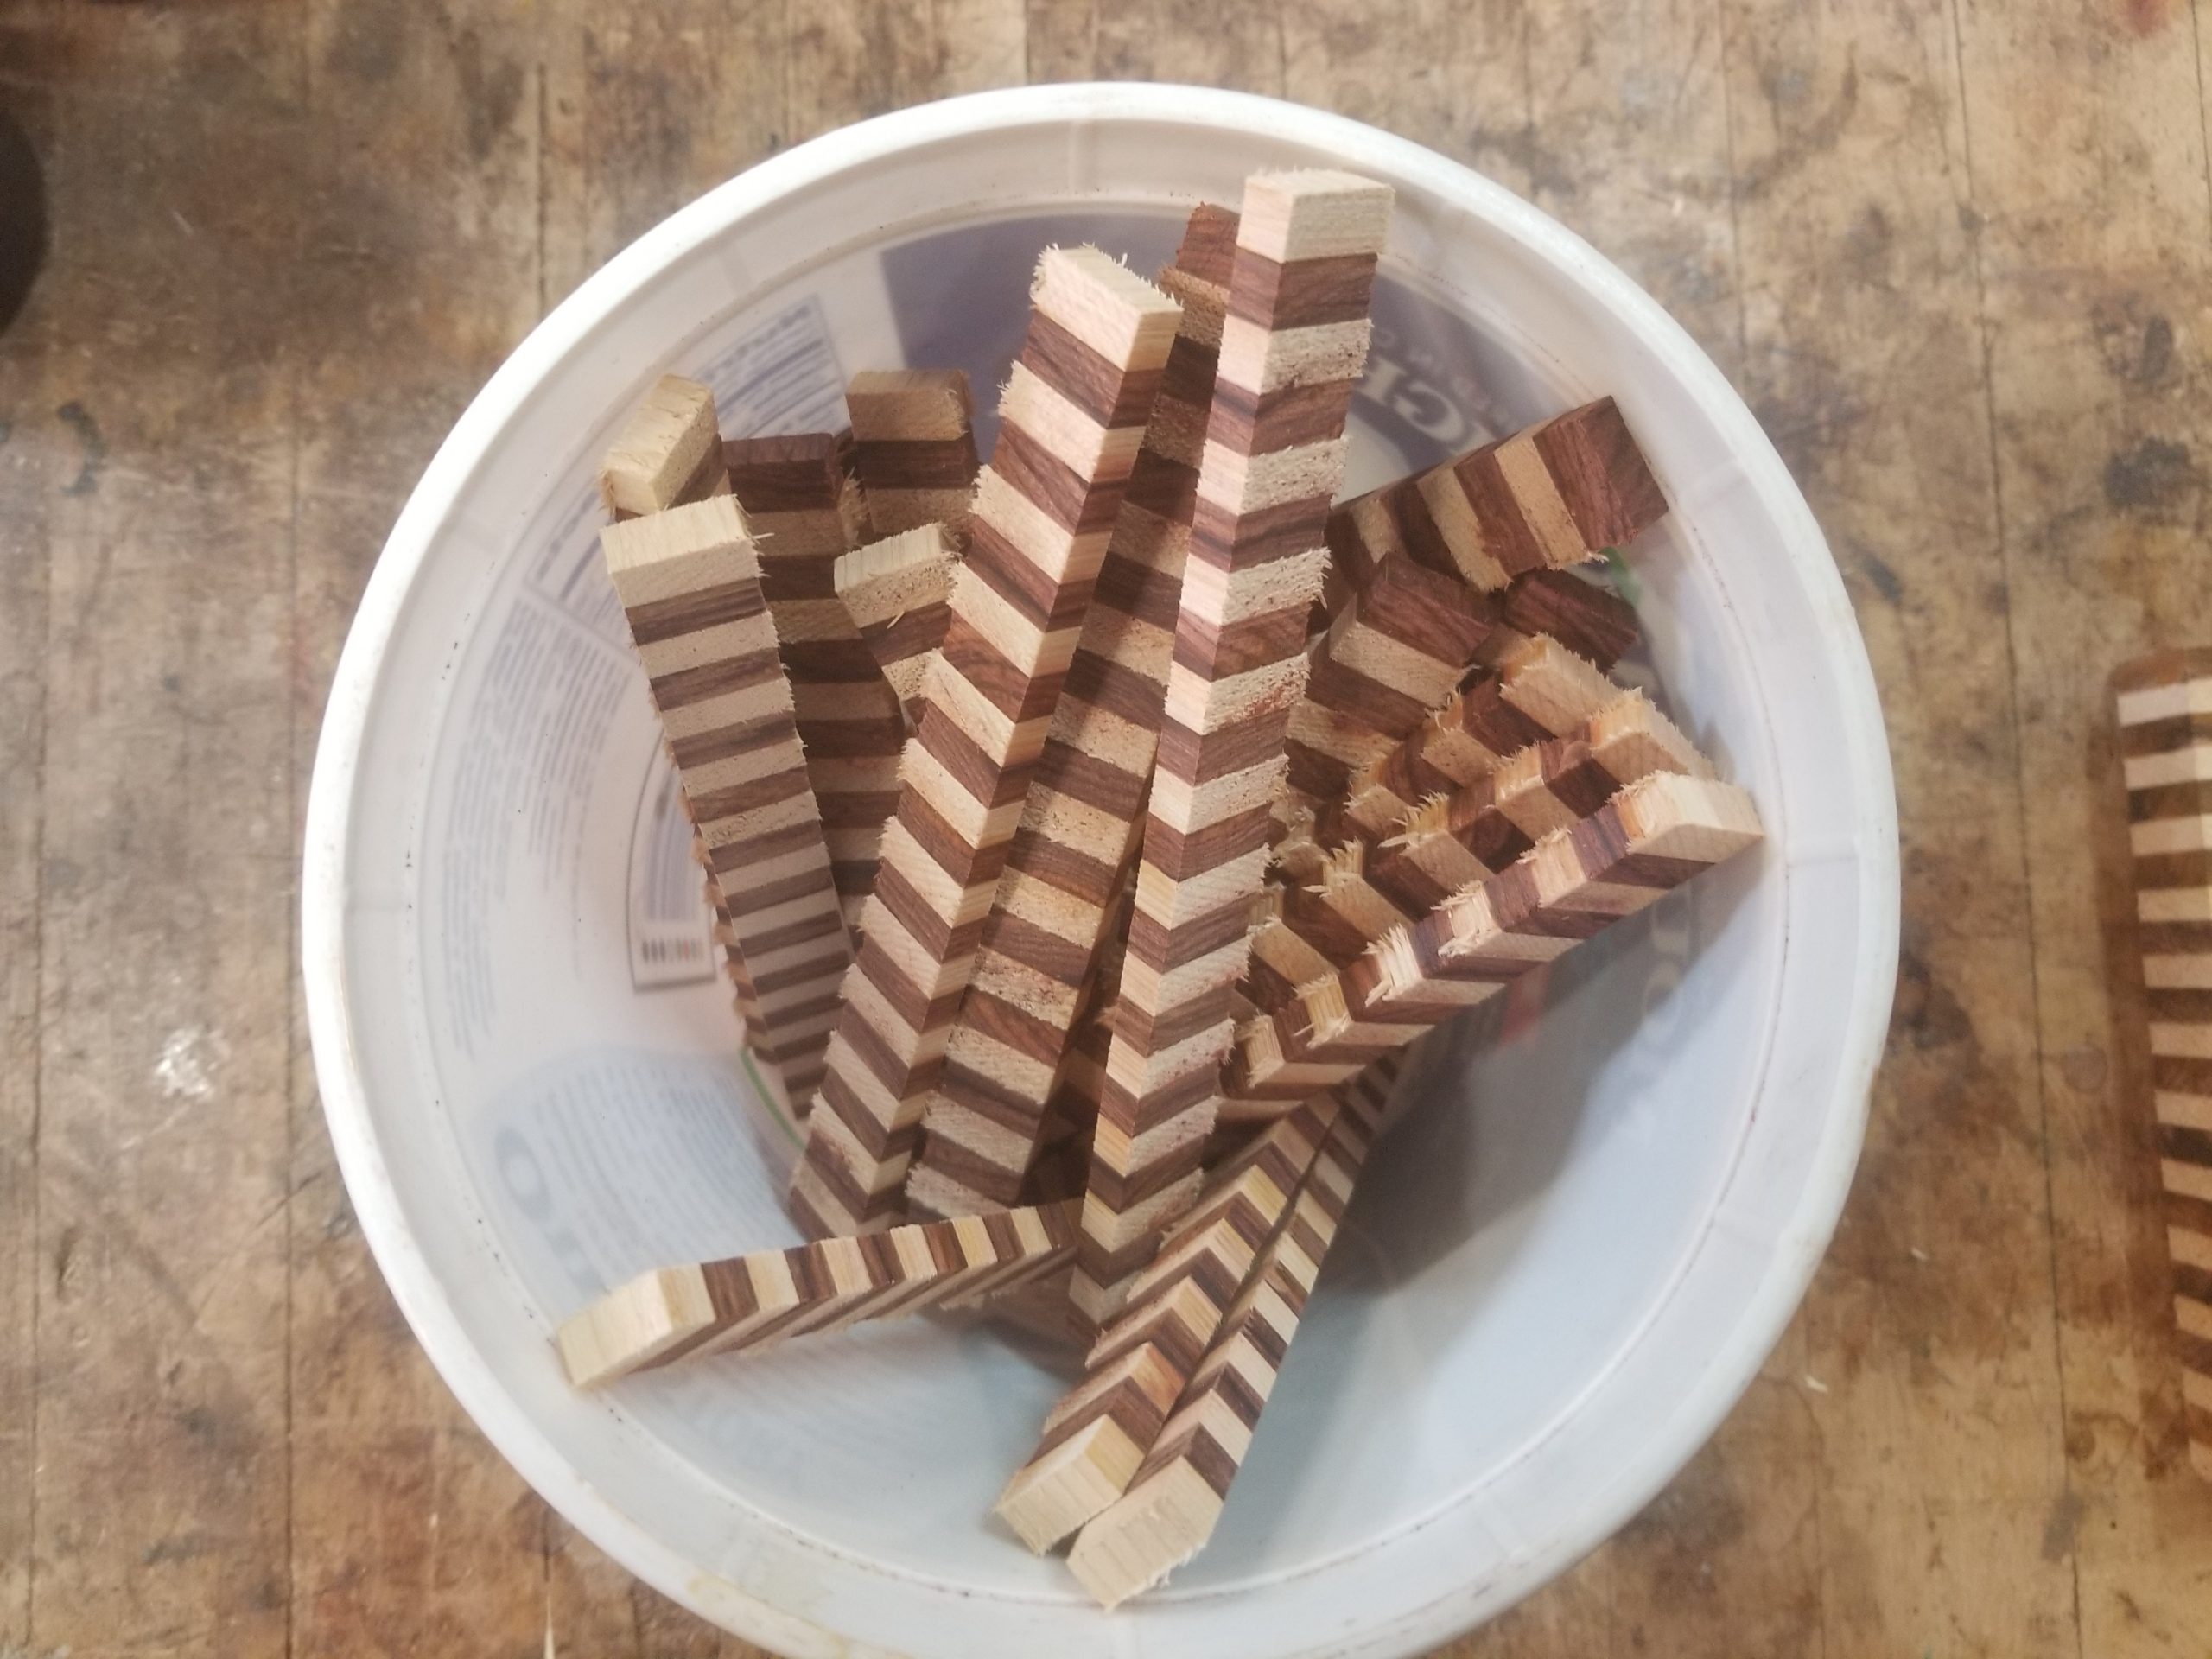
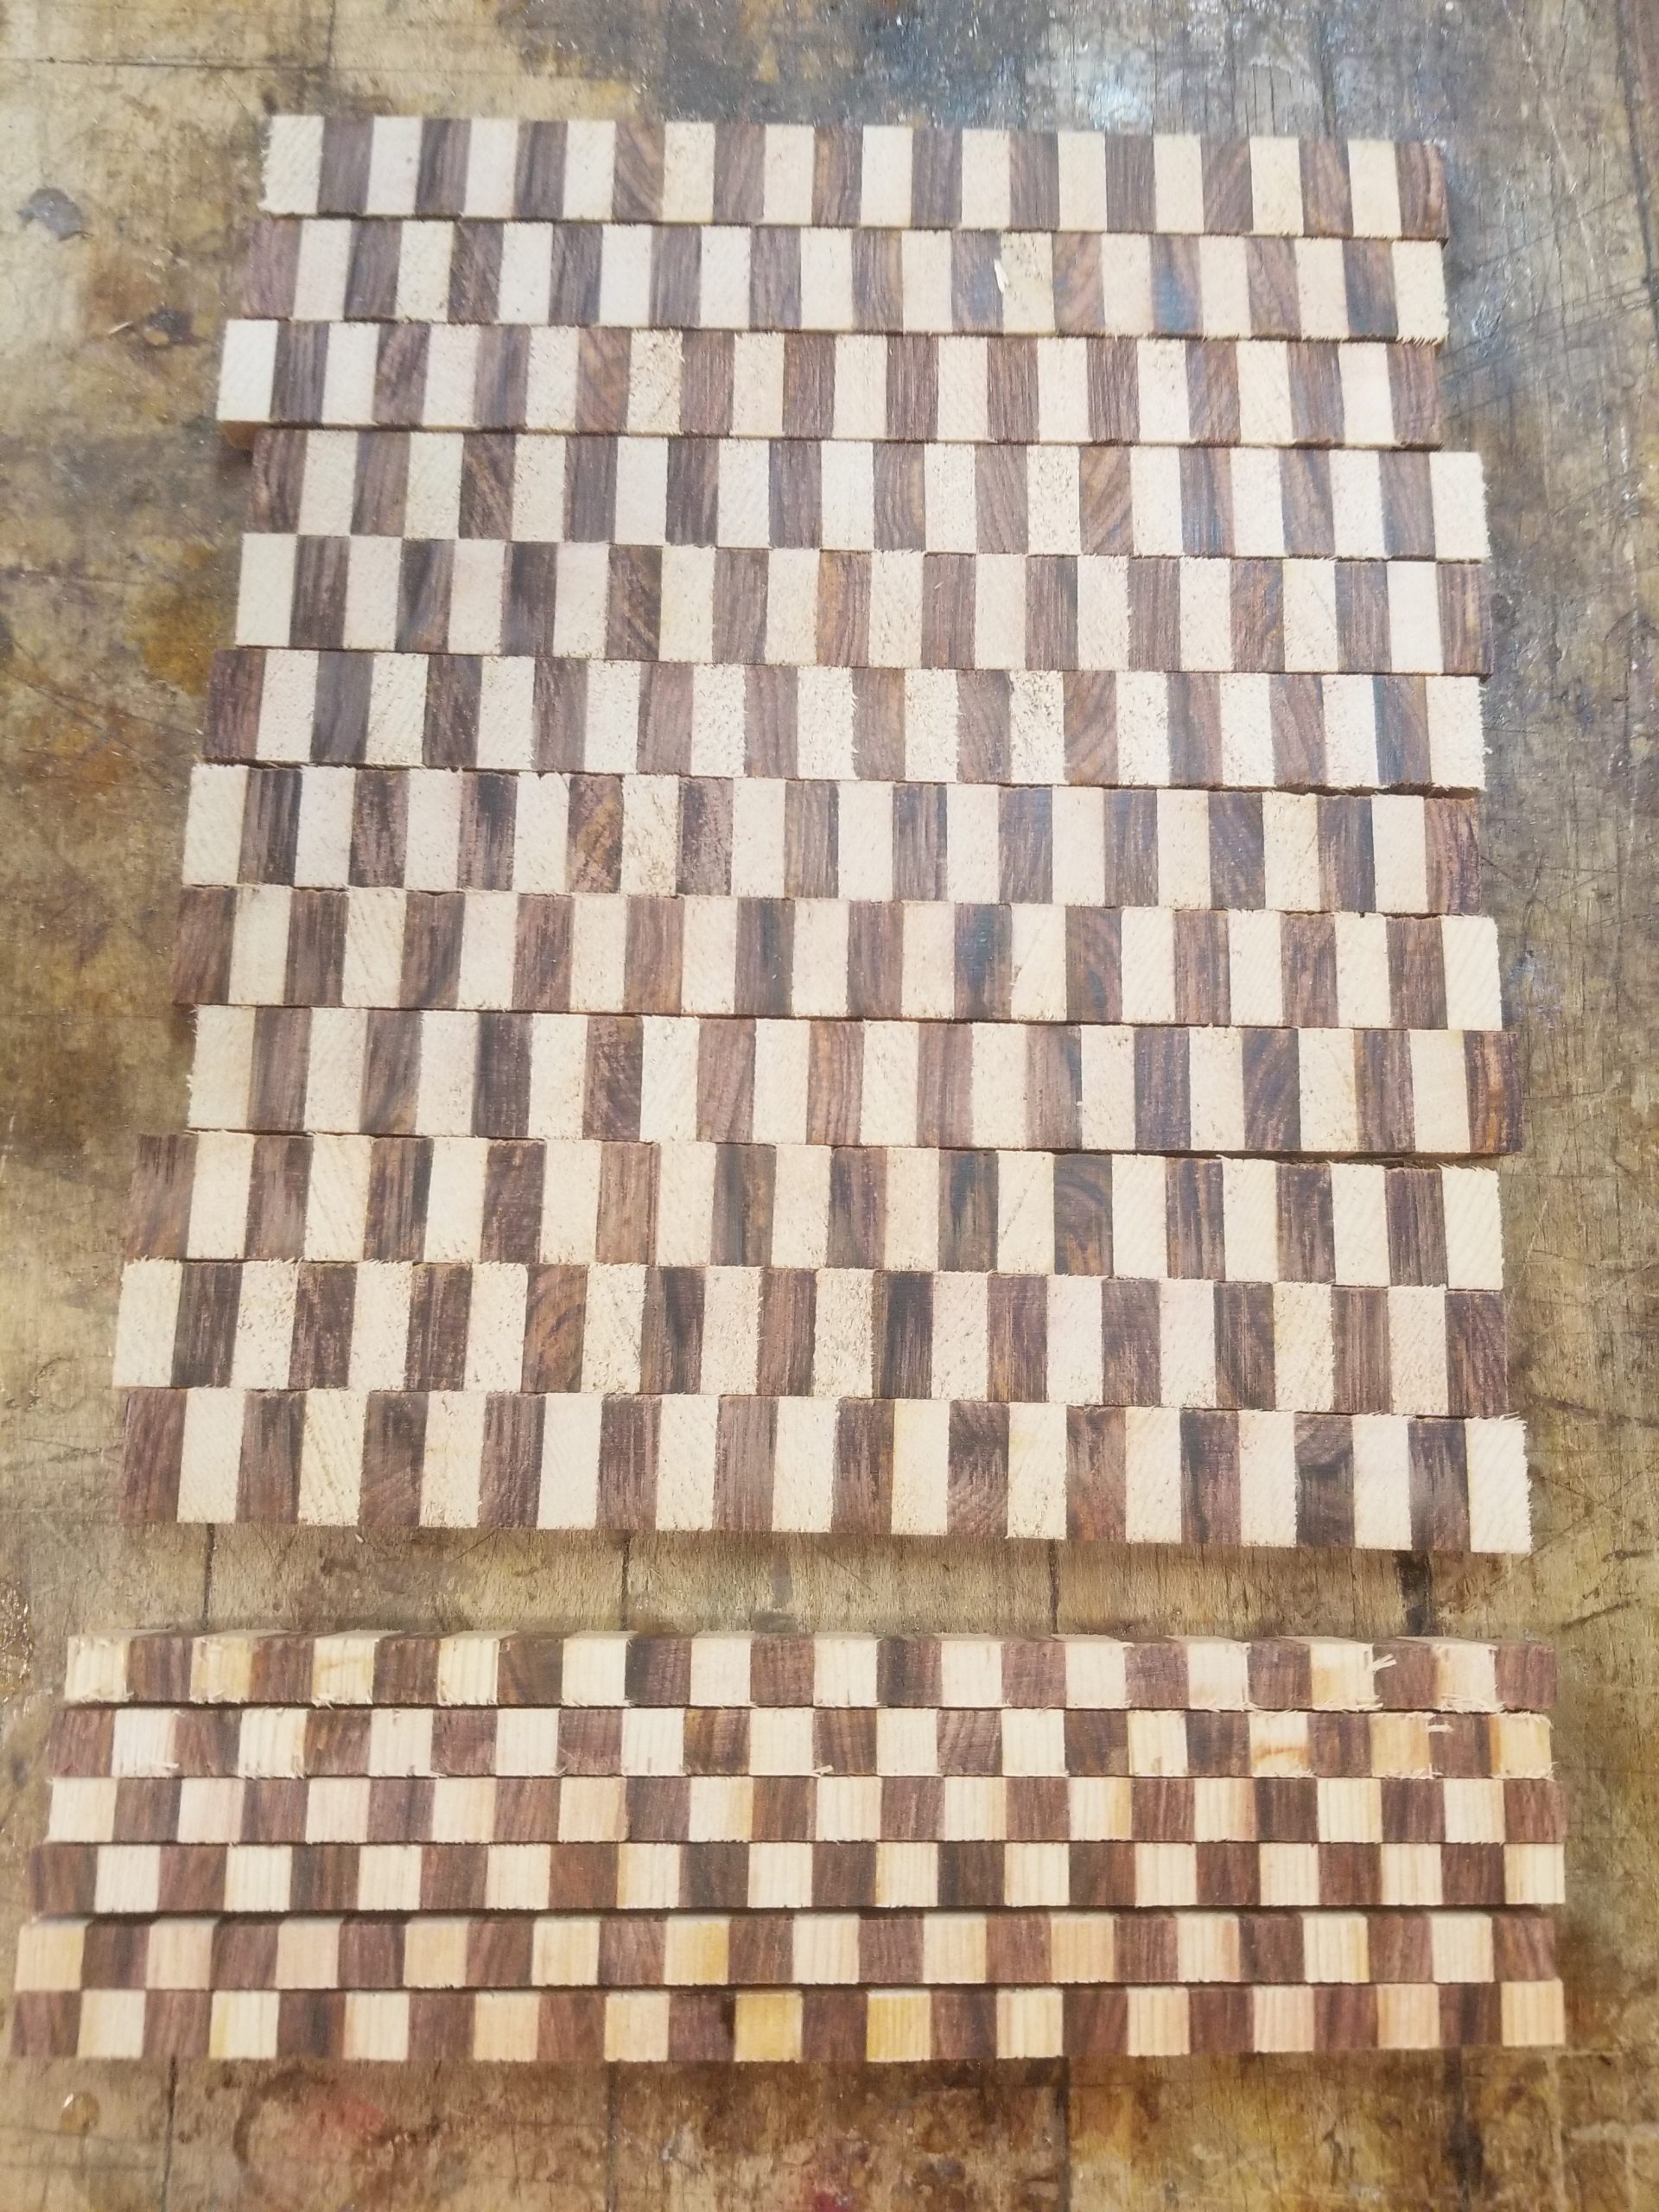
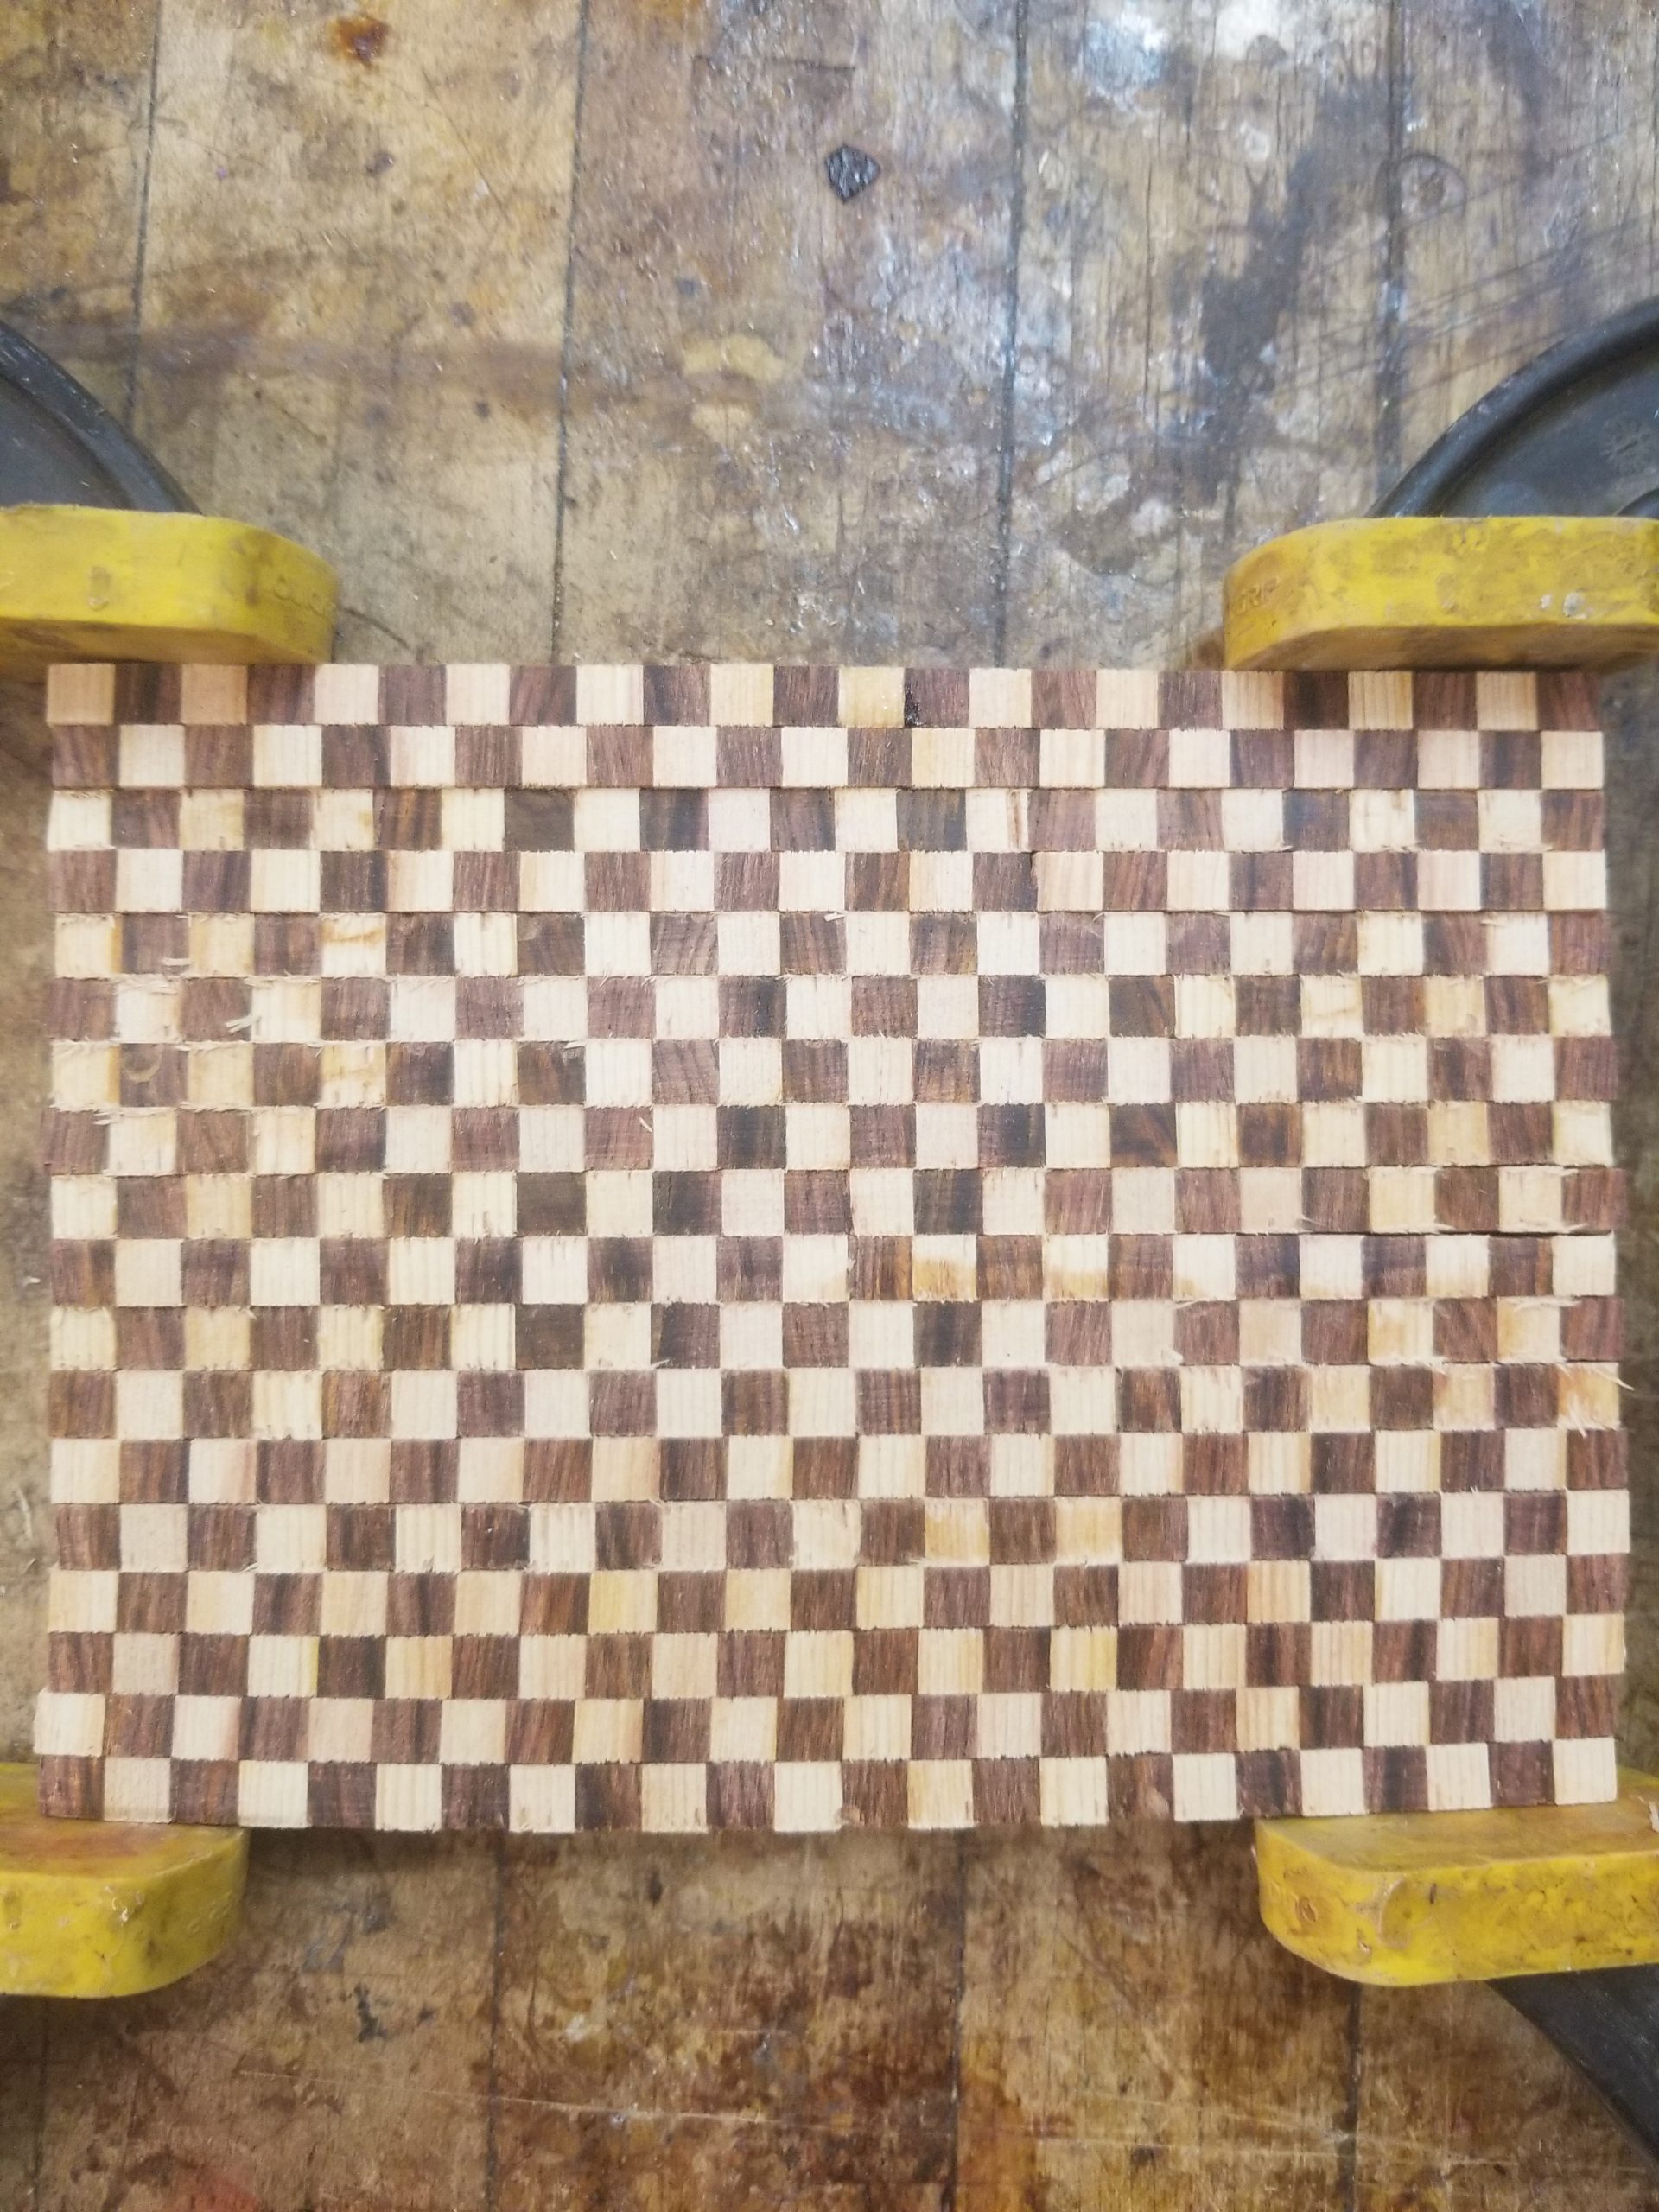
I then began the process of reconstructing the back of the guitar. I could see that Miguel had done this by making sections of checkers, roughly 2”x 4” and gluing down the sections one at a time. I opted to make slightly larger sections, which meant that I would have to glue fewer of them to the back, and it would be easier to line up the checker pattern. Making the checkers involved gluing ¼” strips of rosewood and spruce in a striped pattern (think of a cutting board), then cross cutting ¼” pieces from that striped board. The cut pieces are rearranged into a checker pattern and then glued together. The end result is a checkered block. That block is run on edge through a bandsaw so that it is sliced into pieces about 1/16” thick, resulting in several pieces of checkered veneer. Those pieces were then glued to a new mahogany substrate.
Once the new back was finished and the top and side cracks were addressed, I was able to glue the new back onto the body and bind it. I then focused on replacing pieces of missing checkers on the sides and neck, and securing pieces which were loose.
Once all of the pieces were in place, it was time to work on the finish. I was not conflicted as to whether or not I should refinish the instrument. In old photos of the guitar all of the details come shining through. I wasn’t sure if the finish had darkened that much over time, or if it had been refinished with a darker varnish at some point. I was sure though that it needed to be removed so that all of the guitar's details would once again be prominent features and no longer obscured under a dark finish. To appease any doubts I may have had I delicately scraped off the old finish, saving all of the powdered varnish that was a result. I dissolved that powdered varnish in alcohol in order to make a new varnish. I filtered out the impurities and added some new shellac flakes to add a little freshness and body to the mix. I used this new/old mixture to refinish the instrument. It worked quite well.
I then worked on replacing pieces of pearl that had fallen out of the fingerboard, which were many, and leveling and recrowning the frets. I would have liked to refret the guitar, but the old fingerboard was extremely fragile. The old fingerboards were made out of pearwood and “ebonized” with sulfuric acid, which turns the wood a black gray color. Over time the acid works away at the integrity of the wood and it becomes extremely brittle. The old board would have never survived pulling out the old frets and pounding in some new ones. I had to work with what was there in order to preserve this important detail.
The last step was to clean up the bridge and replace two of the white pieces which were damaged and very tarnished. Once I started working on the bridge, I realized that the white pieces were made up of old piano ivories. Fortunately I’m a bit of a pack rat when it comes to materials and I had some ivories that I had salvaged which I used to replace them. I glued the bridge back in place. When the Acostas glued a bridge onto a guitar, they used an old jack from a Model T Ford. They would glue the bridge on underneath their workbench, using the weight of the bench as a counter against the pressure of the jack. It may seem crude these days, but I’ve seen enough of their old guitars with the bridges intact to know that it worked well enough. I decided to use clamps rather than a Model T jack. Sometimes you have to break with authenticity.
I was able to get a set of old Grover Sta-Tite tuners from the early 40’s from my friend Wil Bremmer at Spruce Tree Music. The old tuners were a nice finishing touch.
Though I don’t have many fancy tools in my shop, I have enough to somewhat speed the process. I have a nice bandsaw, a lovely surface sander and plenty of routers. Miguel Acosta may have had a bandsaw, but he certainly didn’t have a surface sander, or a router at the time he built this guitar. He would have thicknessed his materials, including all of the checkered veneers and mahogany substrates, with a plane and a scraper. He cut all of his inlays with a knife and a chisel and he did it remarkably well. He bent his sides on a flat bottomed household iron, not the nice elliptical iron that modern luthiers use. He used rope for clamping backs and binding. He made due with what he had and built incredible instruments. For this type of project, the biggest tool is patience, and he had that in spades.
This unique guitar is the work of a master luthier who was underappreciated in his own time and largely forgotten in our’s. It is a unique marriage of traditional aesthetic elements with modern design of the time, making it an American masterpiece. Remarkably it is just one of a handful of such instruments made by Miguel Acosta and preserved by his family. A very special thank you to the Acosta family for willingness to share stories, photos and ephemera with me. They have done a marvelous job of preserving their family's instrument making history. Also, thanks to my friend John Maniaci for capturing the beauty and artistry of the guitar with his before and after photos. I feel fortunate to have such people in my life.
